

Onboarding
Signing up already gives you full access to your crypto wallet — you can hold, send, and receive USD₮, Bitcoin, and other assets right away. Identity verification (KYC) is a separate, optional step you only need when you want to convert between crypto and a fiat currency like EUR, GBP, or NGN. This guide walks through all 8 real screens in that flow — including what happens if you start and don’t finish, what changes when you pick Naira, and what happens if a selfie check fails. Once you start, there are 3 steps: Profile → Address → Identity, shown as a stepper at the top of most screens.1. Your home screen nudges you to verify
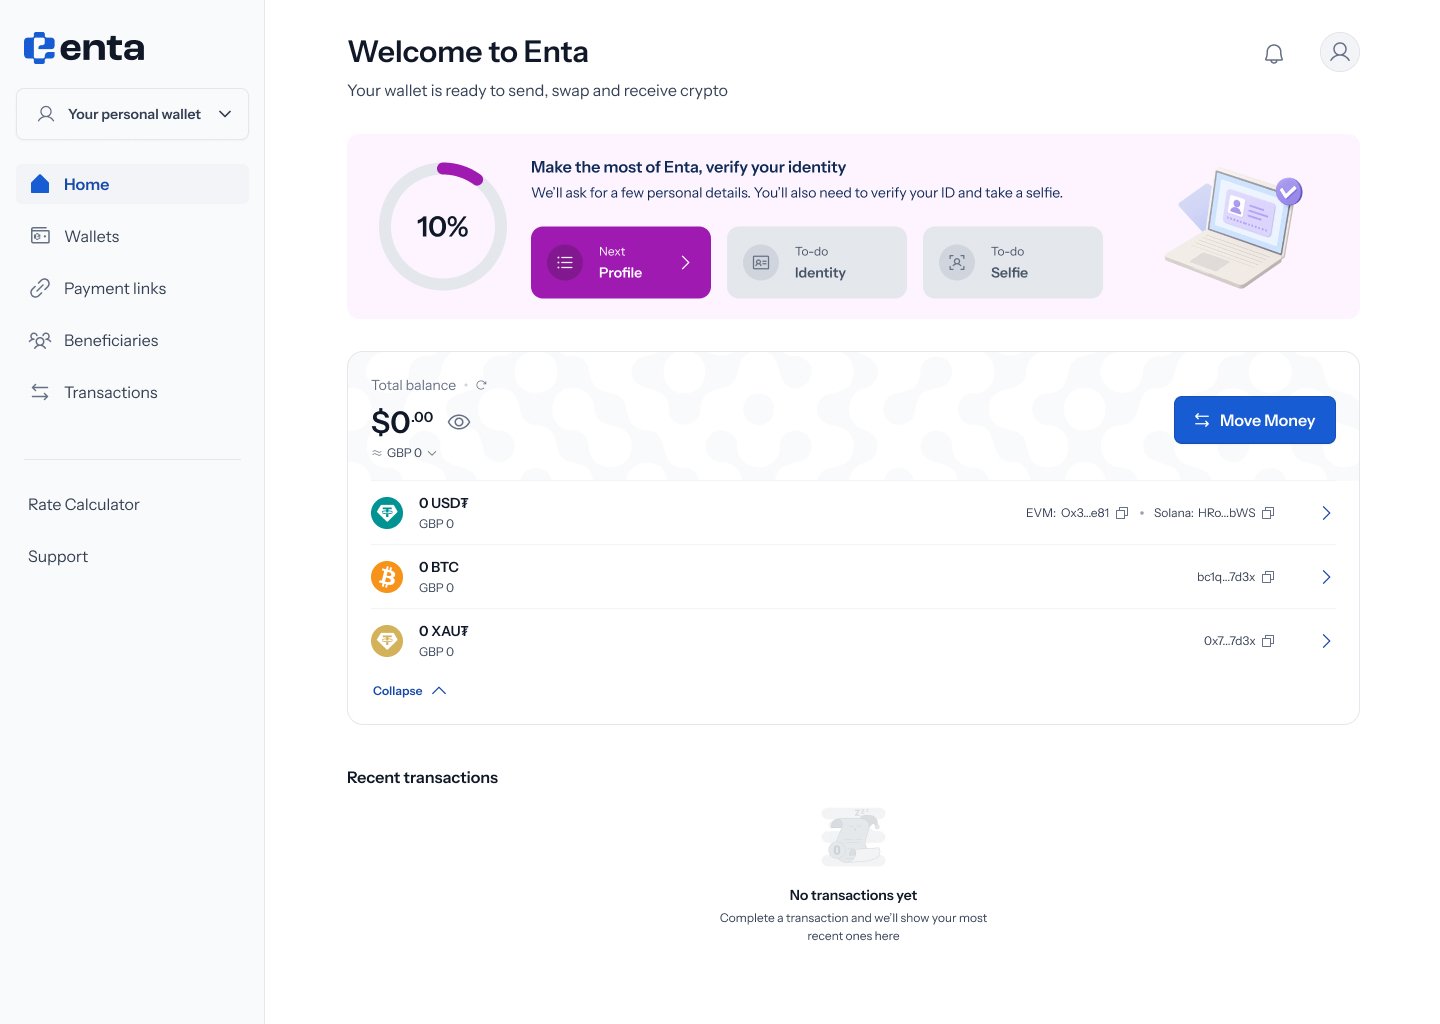
This banner is just a nudge — your wallet balance, transactions, and Move Money button all work normally whether or not you’ve verified.
2. If you started and didn’t finish
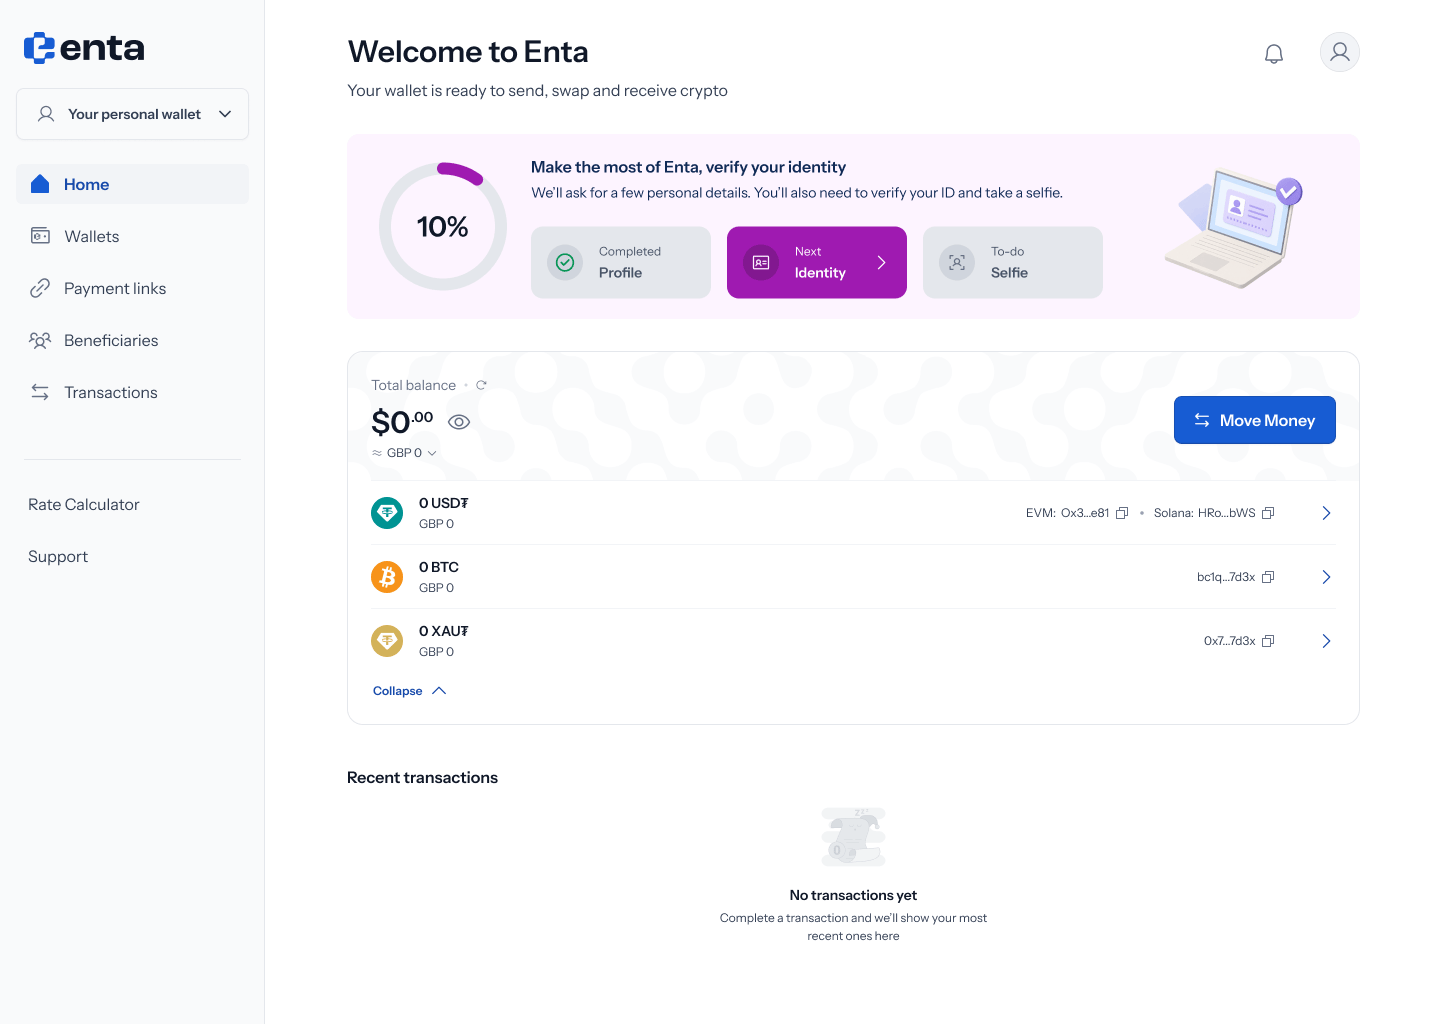
3. Choosing a currency to unlock
 Tapping the verification banner opens “Unlock currency transactions” — “Convert from EUR, GBP, NGN and more to crypto and back.”
Under Select currency needed, you’ll see cards for Euro, Pound, and Naira — pick whichever ones you actually plan to use. Below that, What you’ll need lists exactly what verification involves:
Tapping the verification banner opens “Unlock currency transactions” — “Convert from EUR, GBP, NGN and more to crypto and back.”
Under Select currency needed, you’ll see cards for Euro, Pound, and Naira — pick whichever ones you actually plan to use. Below that, What you’ll need lists exactly what verification involves:
- Add profile information — name, date of birth, phone number
- Add address details — full address information
- Capture identity — selfie and a government ID
4. What changes if you pick Naira
 If you select Naira specifically, two things change on this same screen: the Add profile information requirement expands to “Name, date of birth, phone number, BVN, NIN”, and a consent checkbox appears — “I understand that BVN and NIN are required for Naira transactions.”
BVN and NIN are only required if you select Naira. Sticking with EUR or GBP alone won’t ask for them.
5. Step 1 of 3 — Profile information
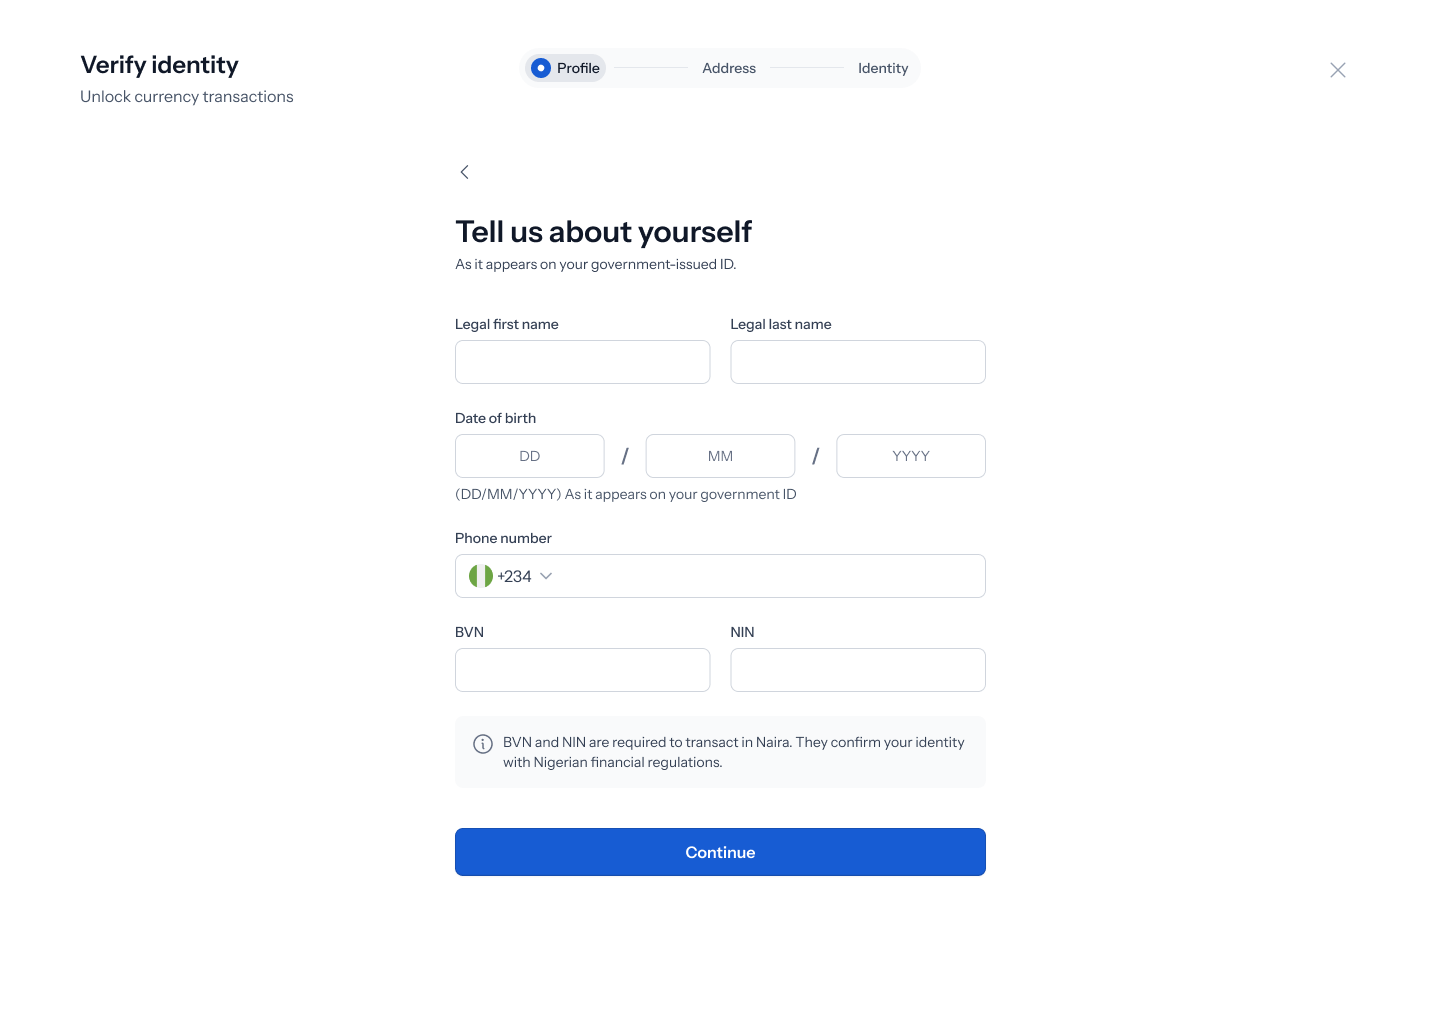
- Legal first name and legal last name
- Date of birth (DD/MM/YYYY) — must match your government ID
- Phone number (with a country code selector)
- BVN and NIN — only shown if you selected Naira in the previous step
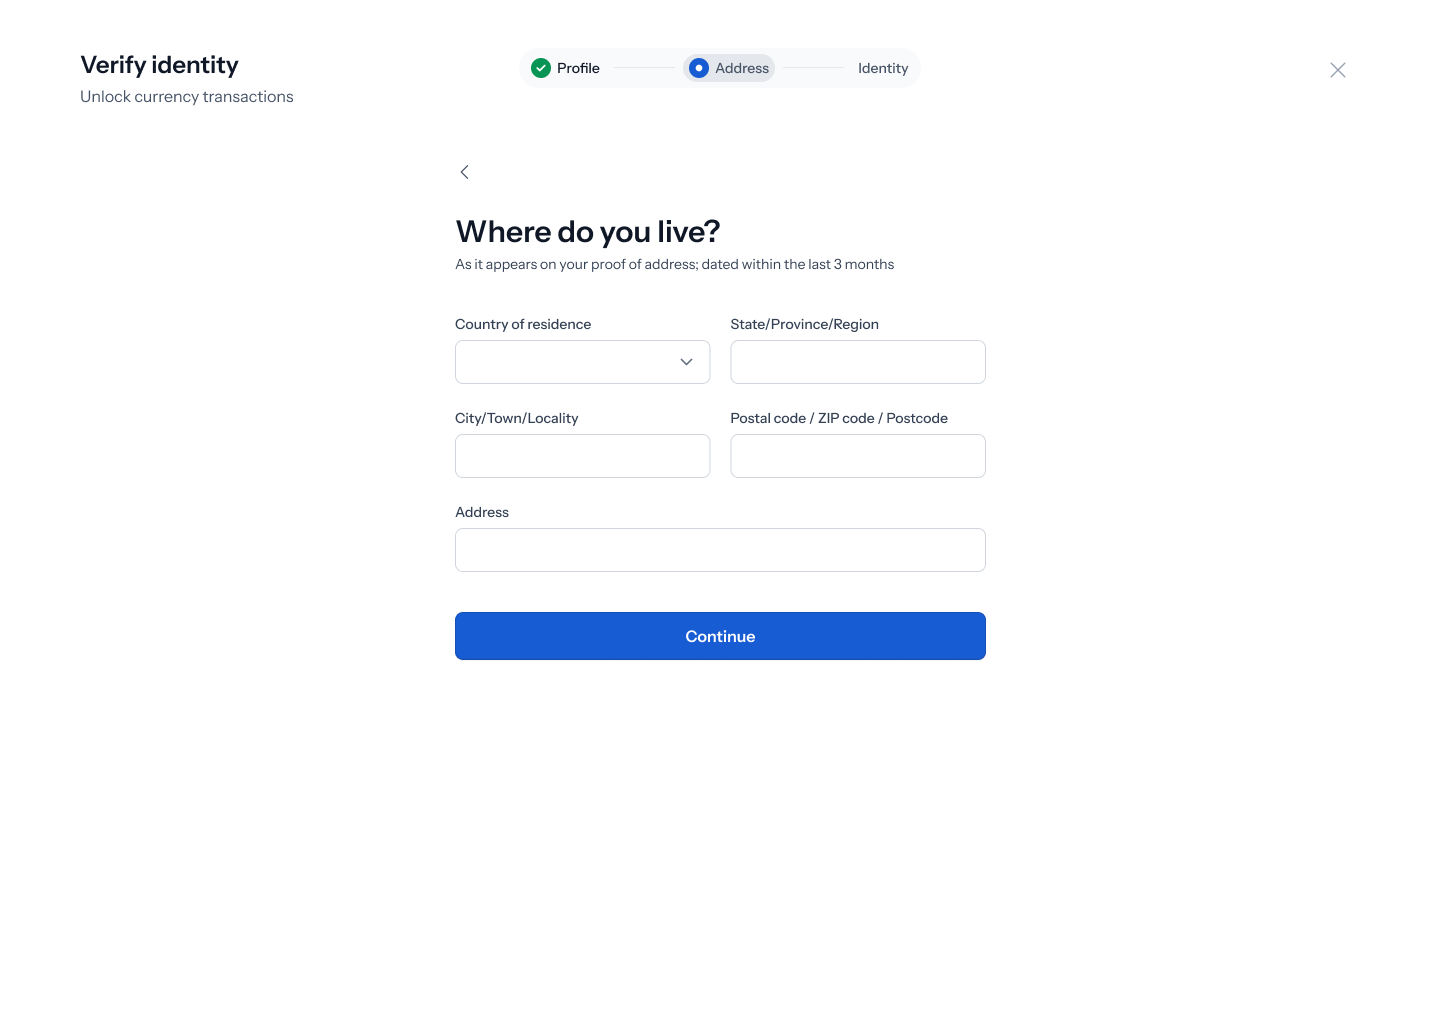
6. Step 2 of 3 — Address
7. Step 3 of 3 — Verify your identity
 The last step: “Let’s verify your identity” — “We will check your Selfie and Government issued ID.”
This step hands off to an embedded identity verification provider (Sumsub) rather than a native Enta form — it’ll walk you through photographing your ID and taking a liveness selfie right there. Most people are approved automatically within a few minutes; in some cases it can take up to 24 hours if manual review is needed.
The last step: “Let’s verify your identity” — “We will check your Selfie and Government issued ID.”
This step hands off to an embedded identity verification provider (Sumsub) rather than a native Enta form — it’ll walk you through photographing your ID and taking a liveness selfie right there. Most people are approved automatically within a few minutes; in some cases it can take up to 24 hours if manual review is needed.
8. If your selfie doesn’t match
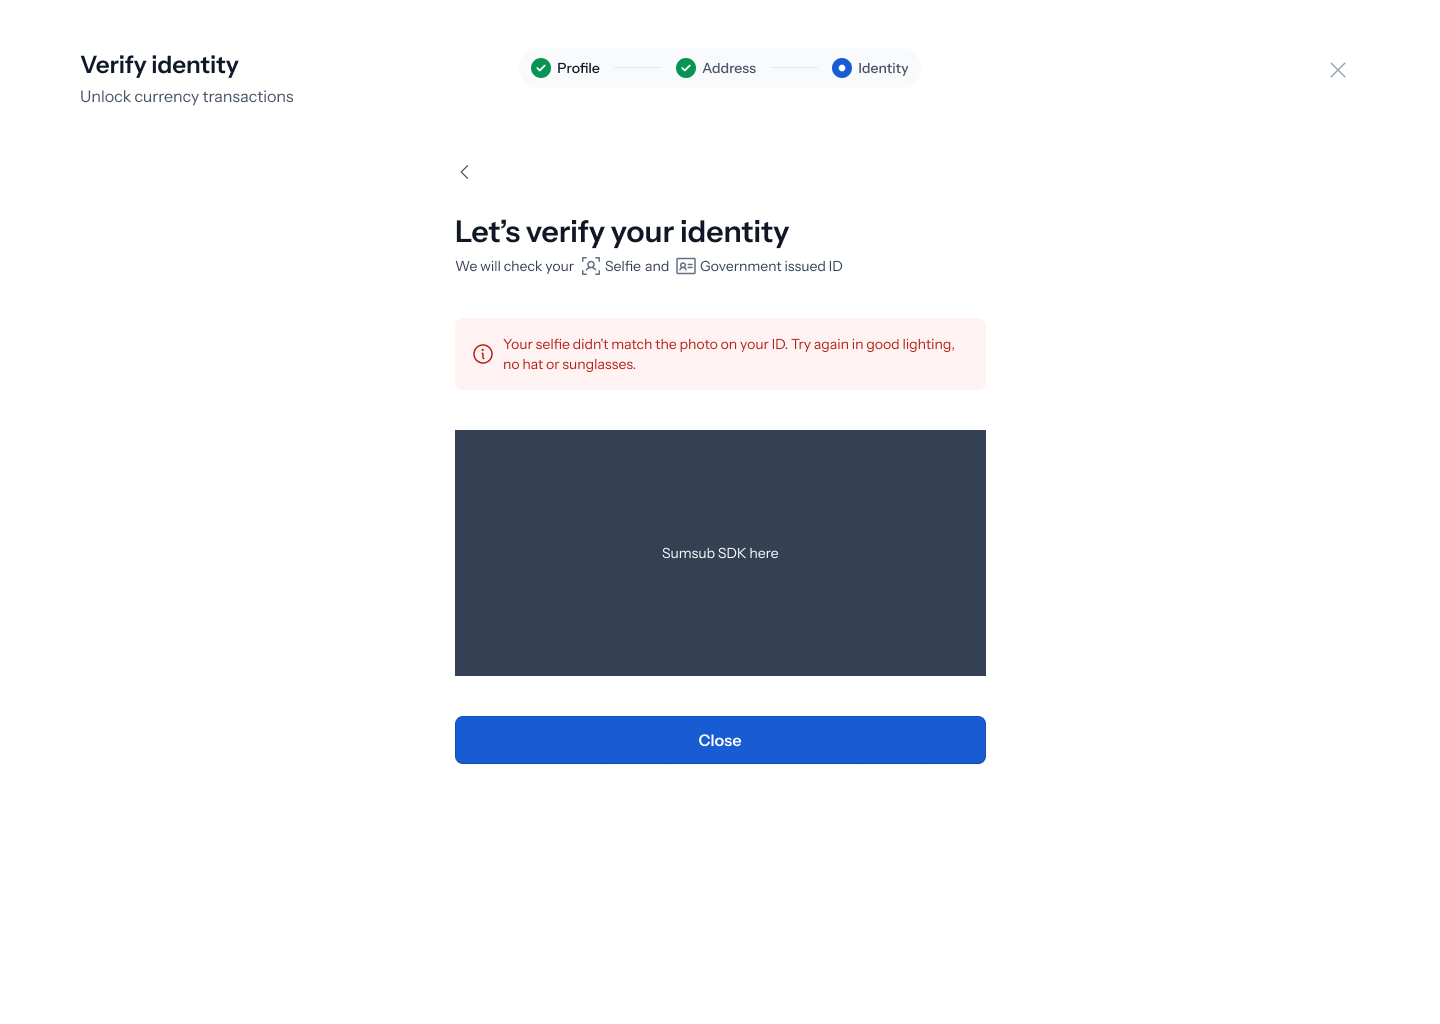 If the liveness selfie doesn’t match the photo on your ID, you’ll see the same verification screen again with a red banner: “Your selfie didn’t match the photo on your ID. Try again in good lighting, no hat or sunglasses.”
Nothing else about your progress is lost — just retake the selfie following that guidance and continue.
If the liveness selfie doesn’t match the photo on your ID, you’ll see the same verification screen again with a red banner: “Your selfie didn’t match the photo on your ID. Try again in good lighting, no hat or sunglasses.”
Nothing else about your progress is lost — just retake the selfie following that guidance and continue.