
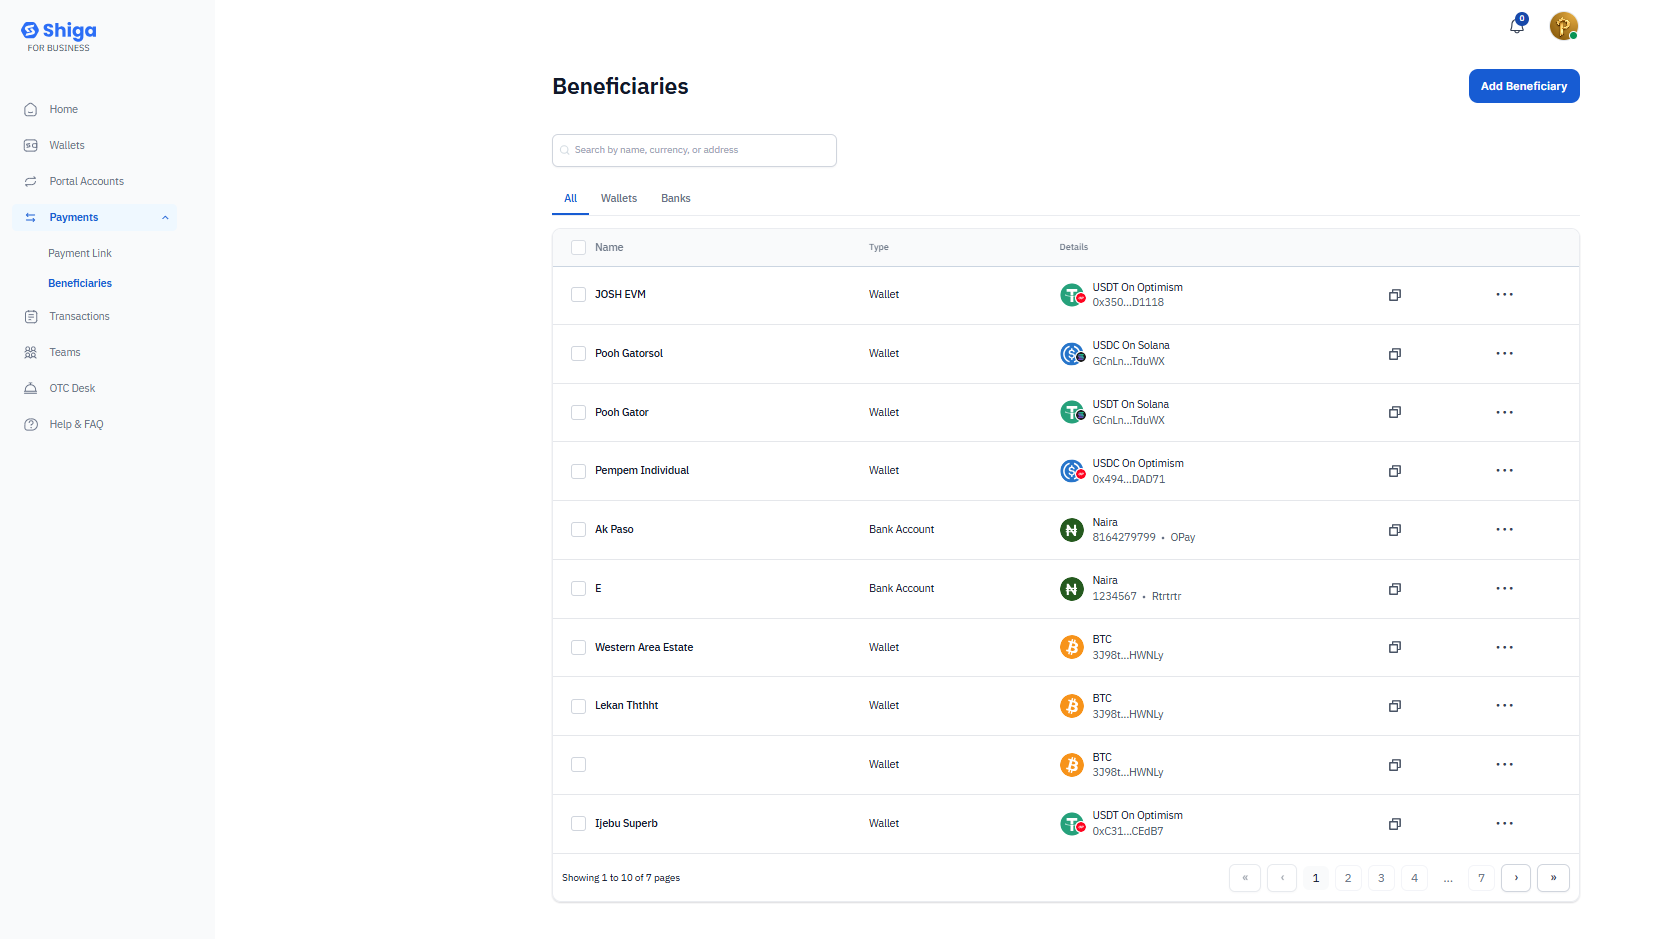
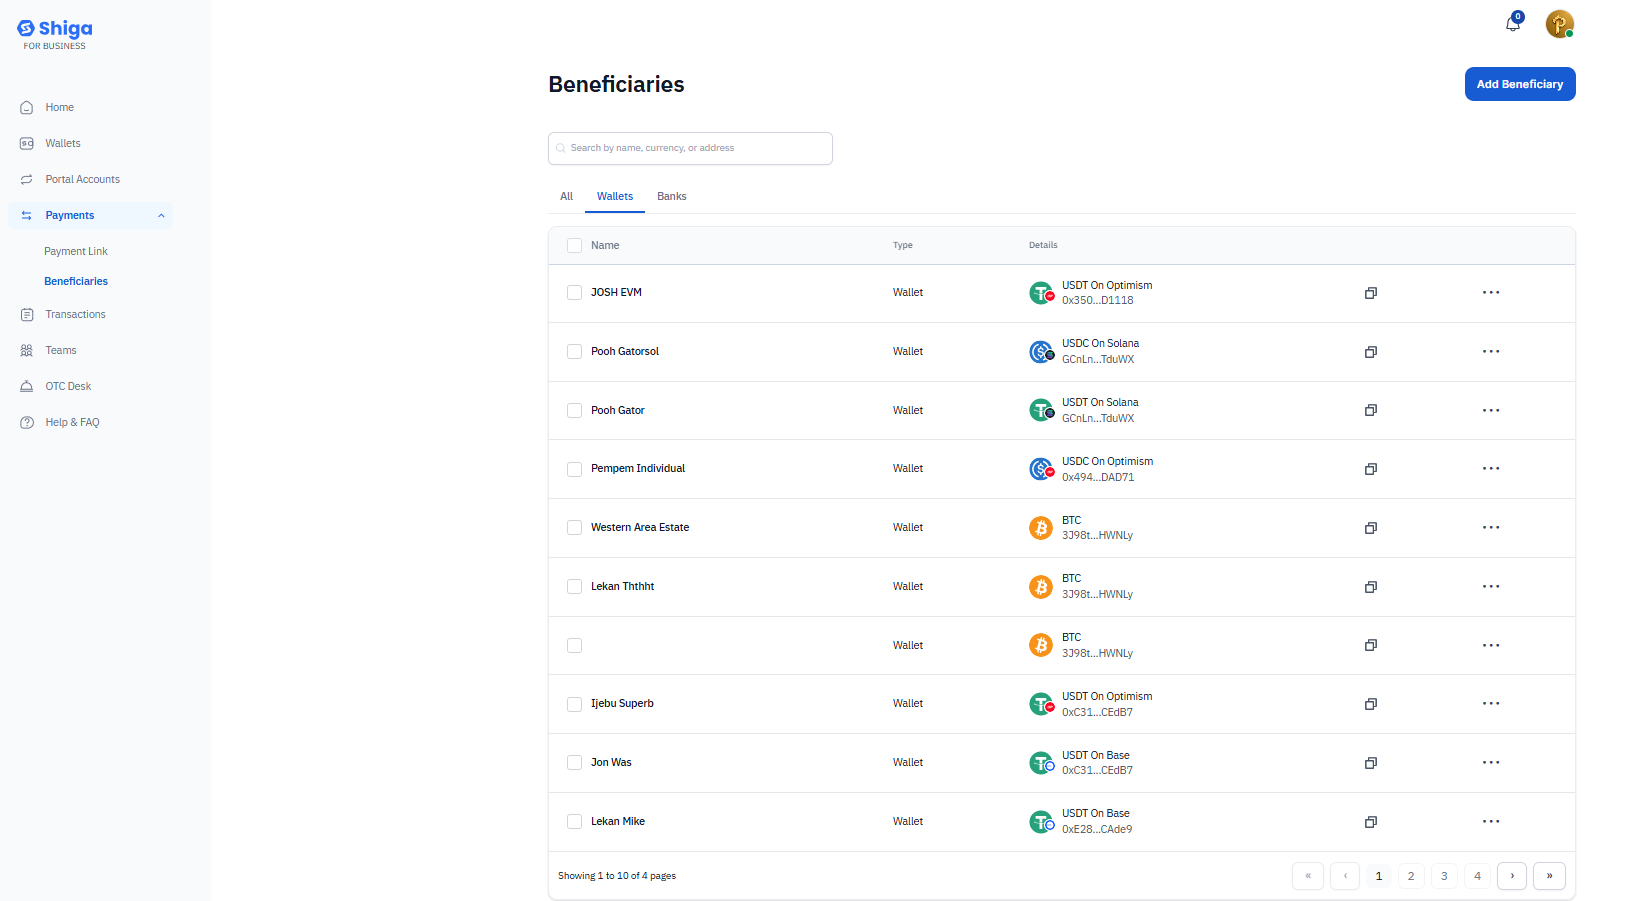
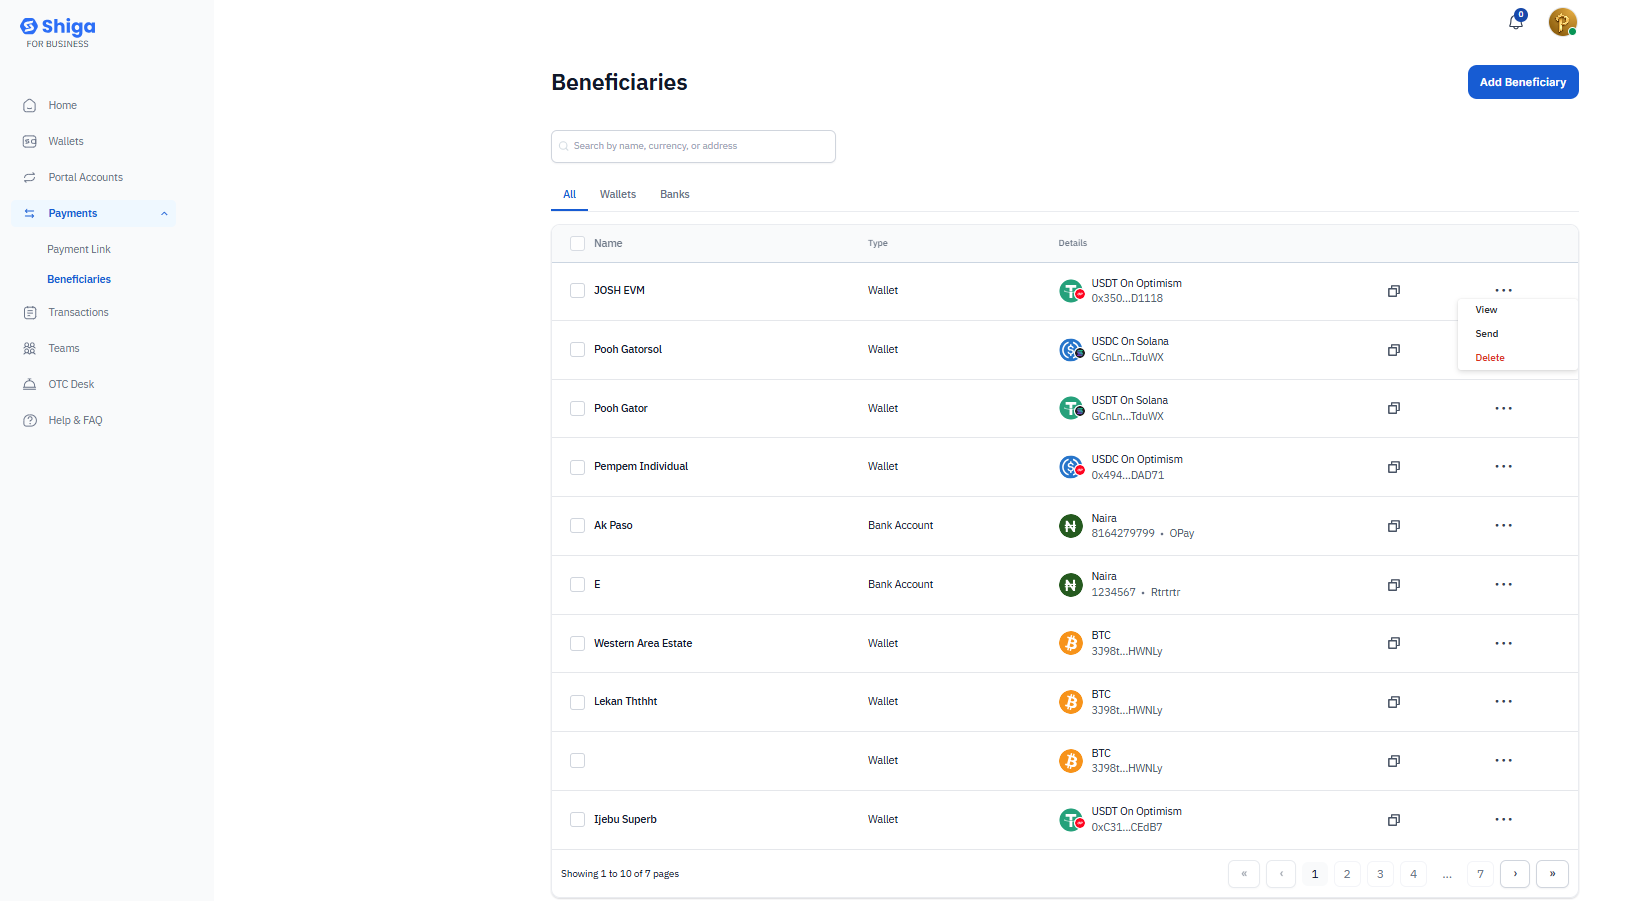
Accessing the Beneficiary Section
- Log into your Shiga Business account.
- From the left sidebar menu, click on Payments.
- Click on Beneficiaries from the dropdown menu.
-
You’ll see your beneficiary list with three tabs: All, Wallets, and Banks.
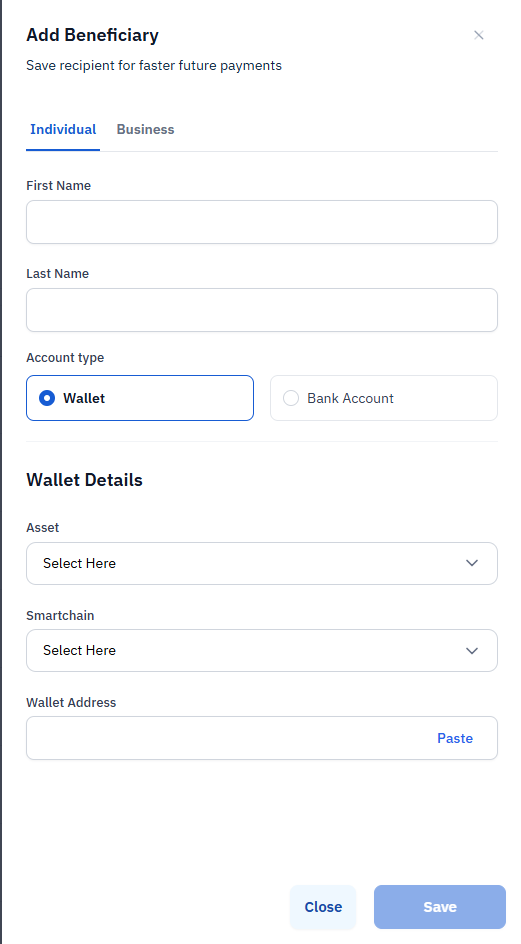
Adding a New Beneficiary
Step 1: Start the Process.
- Click the “Add Beneficiary” button in the top right corner of the Beneficiaries page.
- The “Add Beneficiary” form will open.
Step 2: Choose Account Type
You can add two types of beneficiaries:- Individual - For personal accounts.
- Business - For business accounts.
Step 3: Enter Basic Information
- First Name - Enter the beneficiary’s first name.
- Last Name - Enter the beneficiary’s last name.
Step 4: Select Account Type
Choose between:- Wallet - For cryptocurrency wallet addresses.
-
Bank Account - For traditional bank accounts.
Managing Wallet Beneficiaries
Adding a Wallet Beneficiary
- In the Add Beneficiary form, select “Wallet” as the account type.
- Complete the Wallet Details section:
- Asset - Click “Select Here” to choose the cryptocurrency (e.g., USDT, USDC, BTC).
- Smartchain - Click “Select Here” to choose the blockchain network (e.g., Optimism, Solana, Base).
- Wallet Address - Enter the recipient’s wallet address or click “Paste” to paste from clipboard.
- Click “Save” to add the beneficiary.
Viewing Wallet Beneficiaries
- Click on the “Wallets” tab to filter and view only wallet beneficiaries.
- You’ll see a list showing:
- Beneficiary name.
- Wallet type (Wallet).
- Asset and network details (e.g., “USDT On Optimism”).
- Truncated wallet address (e.g., “0x350…D1118”).
Example Wallet Beneficiaries:
- JOSH EVM - USDT on Optimism.
- Pooh Gatorsol - USDC on Solana.
- Pooh Gator - USDT on Solana.
- Western Area Estate - BTC wallet.
-
Lekan Thithit - BTC wallet.
Managing Bank Beneficiaries
Adding a Bank Beneficiary
- In the Add Beneficiary form, select “Bank Account” as the account type.
- Complete the bank account details:
- First Name and Last Name.
- Bank-specific information (account number, bank name, etc.).
- Click “Save” to add the beneficiary.
Viewing Bank Beneficiaries
- Click on the “Banks” tab to filter and view only bank account beneficiaries.
- You’ll see a list showing:
- Beneficiary name.
- Account type (Bank Account).
-
Currency and account details.
Viewing Beneficiary Details
Accessing Full Details
- Locate the beneficiary in your list
- Click the three dots (•••) menu on the right side of their row
- Select “View” from the dropdown menu
- A side panel will open showing complete details:
Information Displayed:
- Name and Type (e.g., “JOSH EVM - Wallet • Individual”).
- Asset - The cryptocurrency type.
- Smartchain Network - The blockchain network.
- Wallet Address - Full address with copy button.
- Recent Transactions tab (if applicable).
- Delete Beneficiary option at the bottom.
Quick Actions from Details View:
- Edit - Click the pencil icon to modify details
- Send - Click the paper plane icon to initiate a payment.
- Copy Address - Click the copy icon next to the wallet address.