
Crypto Request Form
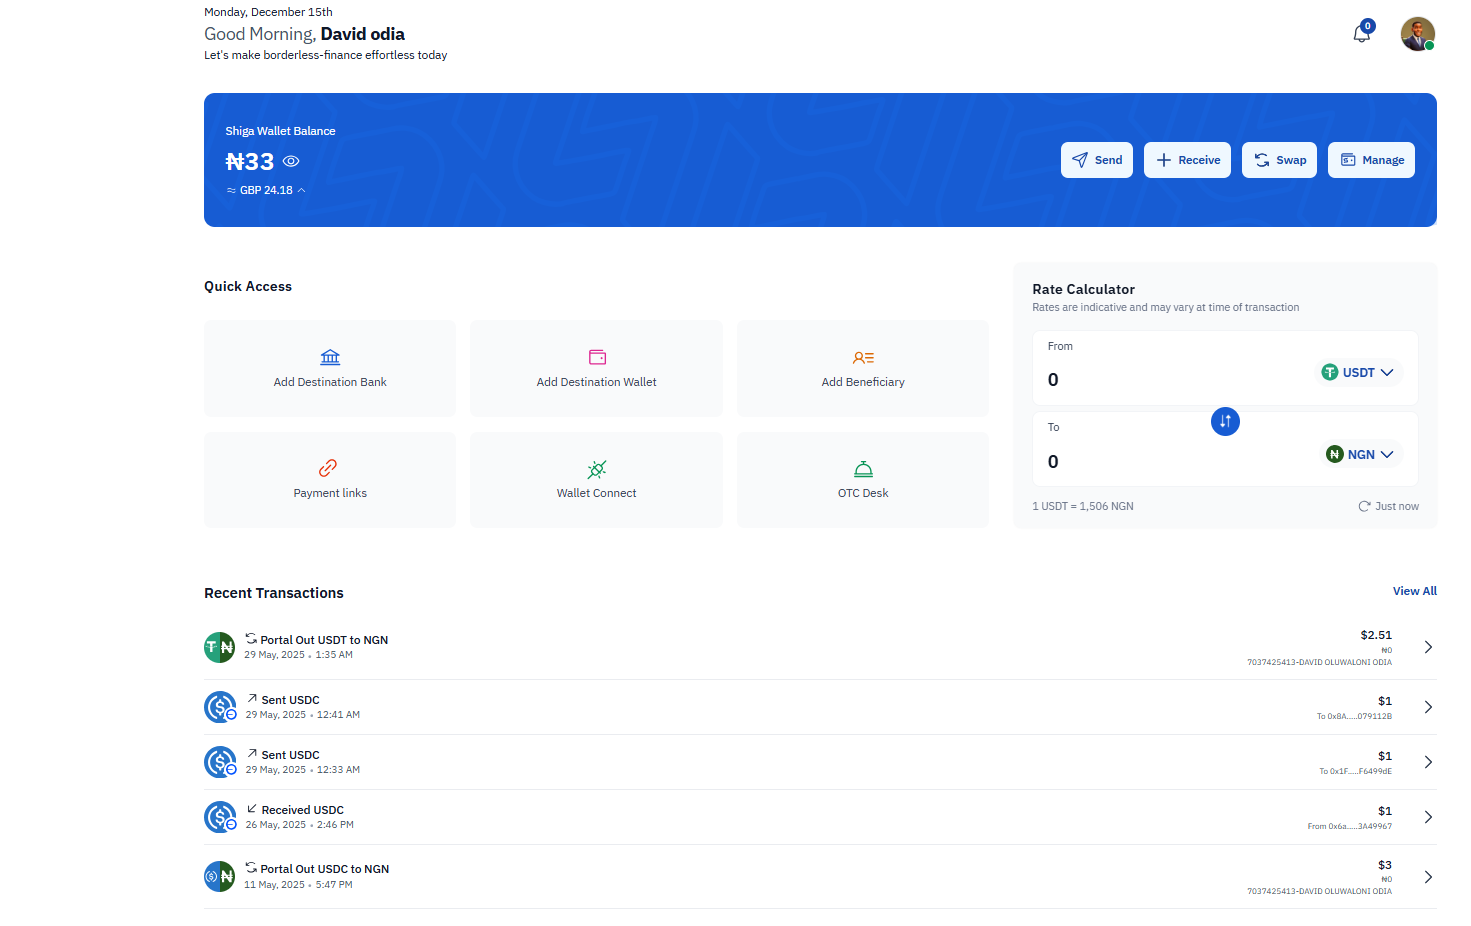
Step 1: Access the Payment Request Form
- Log in to your Shiga account
-
Navigate to the “Payment links” section.
Step 2: Fill in Recipient Details
- Select Crypto Currency: Choose between available options.
- Recipient Information:
- Enter the recipient’s first name in “Recipient First Name” field.
- Enter the recipient’s last name in “Recipient Last Name” field.
- Check “On Corporate” if this is a business payment.
- Enter the recipient’s email address in “Recipient Email” field.
-
Note: Shiga will send the payment request to this email address.
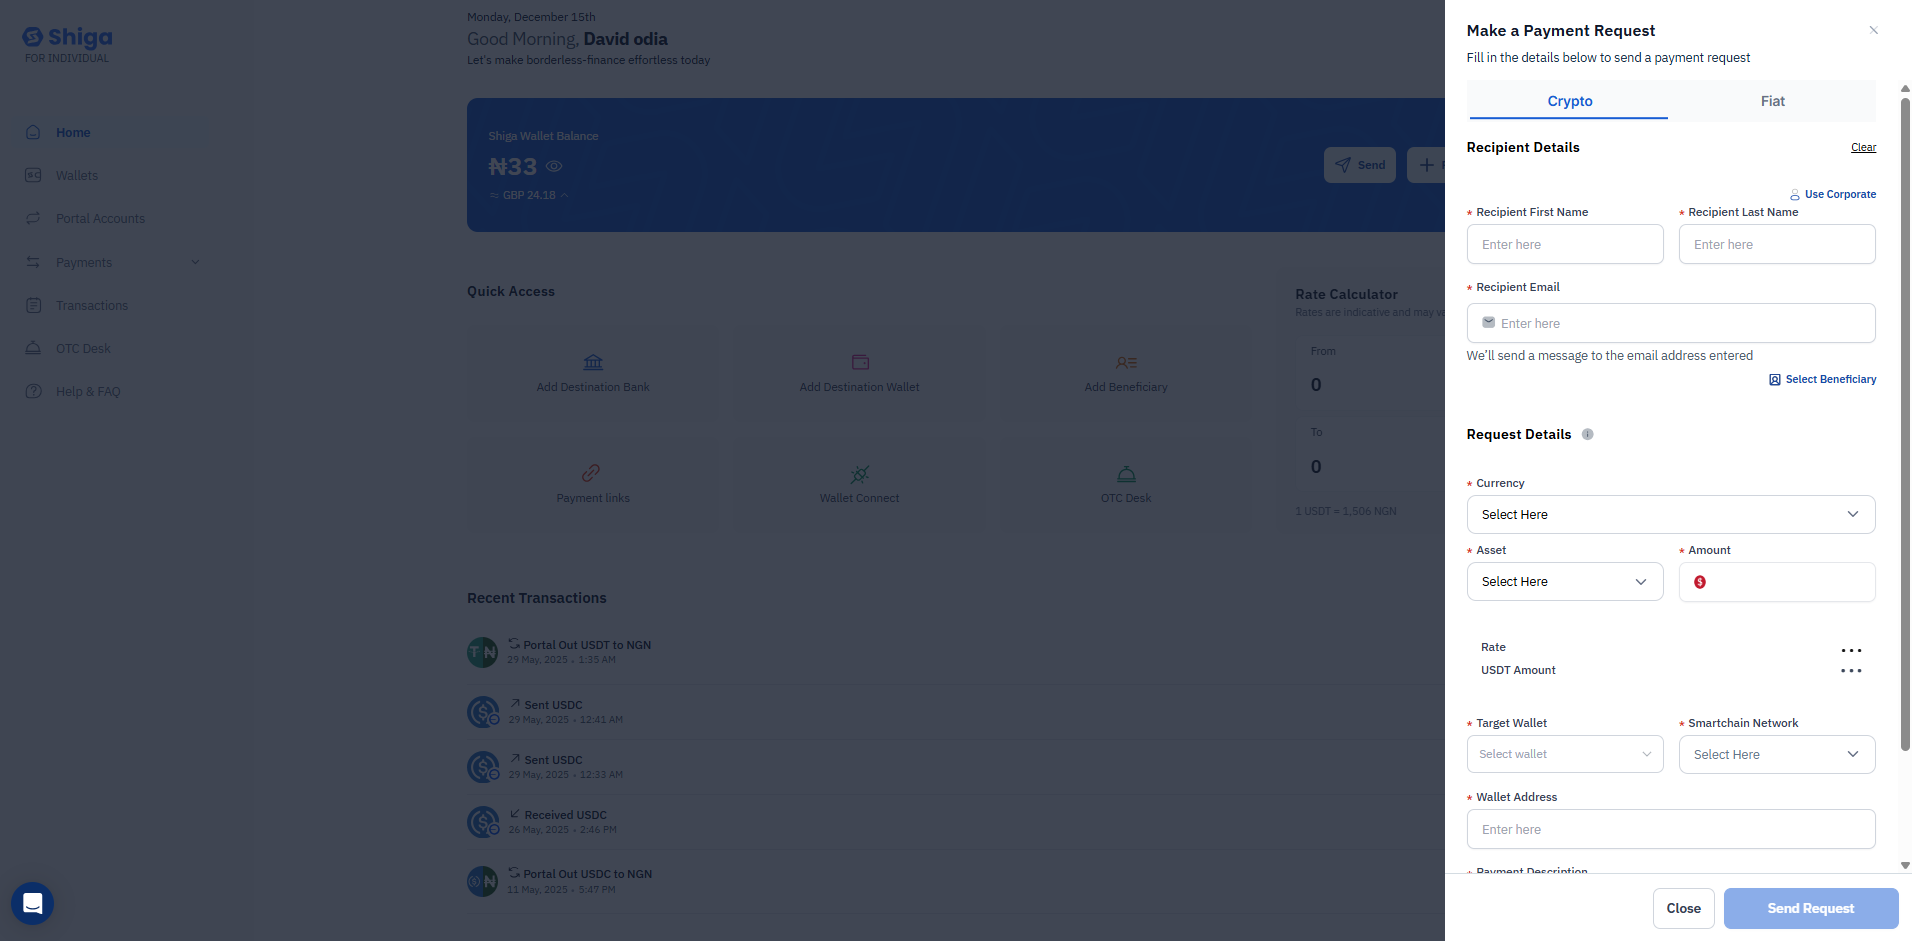
Step 3: Configure Request Details
- Currency Selection:
- Choose the currency from the dropdown menu (“Select Here”).
- Asset and Amount:
- Select the cryptocurrency asset from the “Asset” dropdown.
- Enter the amount in dollars ($) in the “Amount” field.
- Rate and UID Amount: These fields will auto-populate based on your selections.
- Target Wallet and Network:
- Select a valid option from “Target Wallet” dropdown.
- Choose the appropriate network from “SmartchainNetwork” dropdown.
- Wallet Address:
- Enter the recipient’s wallet address in the “Wallet Address” field.
- Payment Description:
- Add any relevant notes about the payment in the “Payment Description” field.
Step 4: Review and Send
- Double-check all entered information for accuracy.
- Click “Send Request” to generate the payment link.
-
Alternatively, click “Close” to cancel the request.
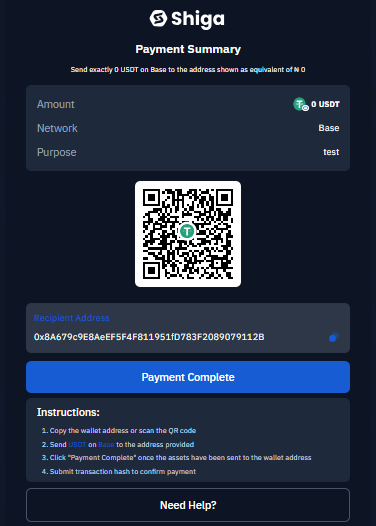
Step 5: Payment Confirmation (Recipient’s View)
Once the recipient receives the payment link, they will see a payment summary.- Payment Summary displays:
- Exact amount to send (e.g., USDT on Base).
- Network information (e.g., “Base”).
- Purpose (if specified, e.g., “test”).
- Recipient wallet address (e.g., “0x8A479c9E8a6EF5F4F811951D7B3F20890791128”).
- Payment Instructions:
- Copy the wallet address or scan the QR code.
- Send the specified amount .
- Click “Payment Complete” after sending.
- Submit the transaction hash to confirm payment.
Fiat Request Form
Step 1: Access the Payment Request Form
- Log in to your Shiga account.
-
Navigate to “Payment links” .
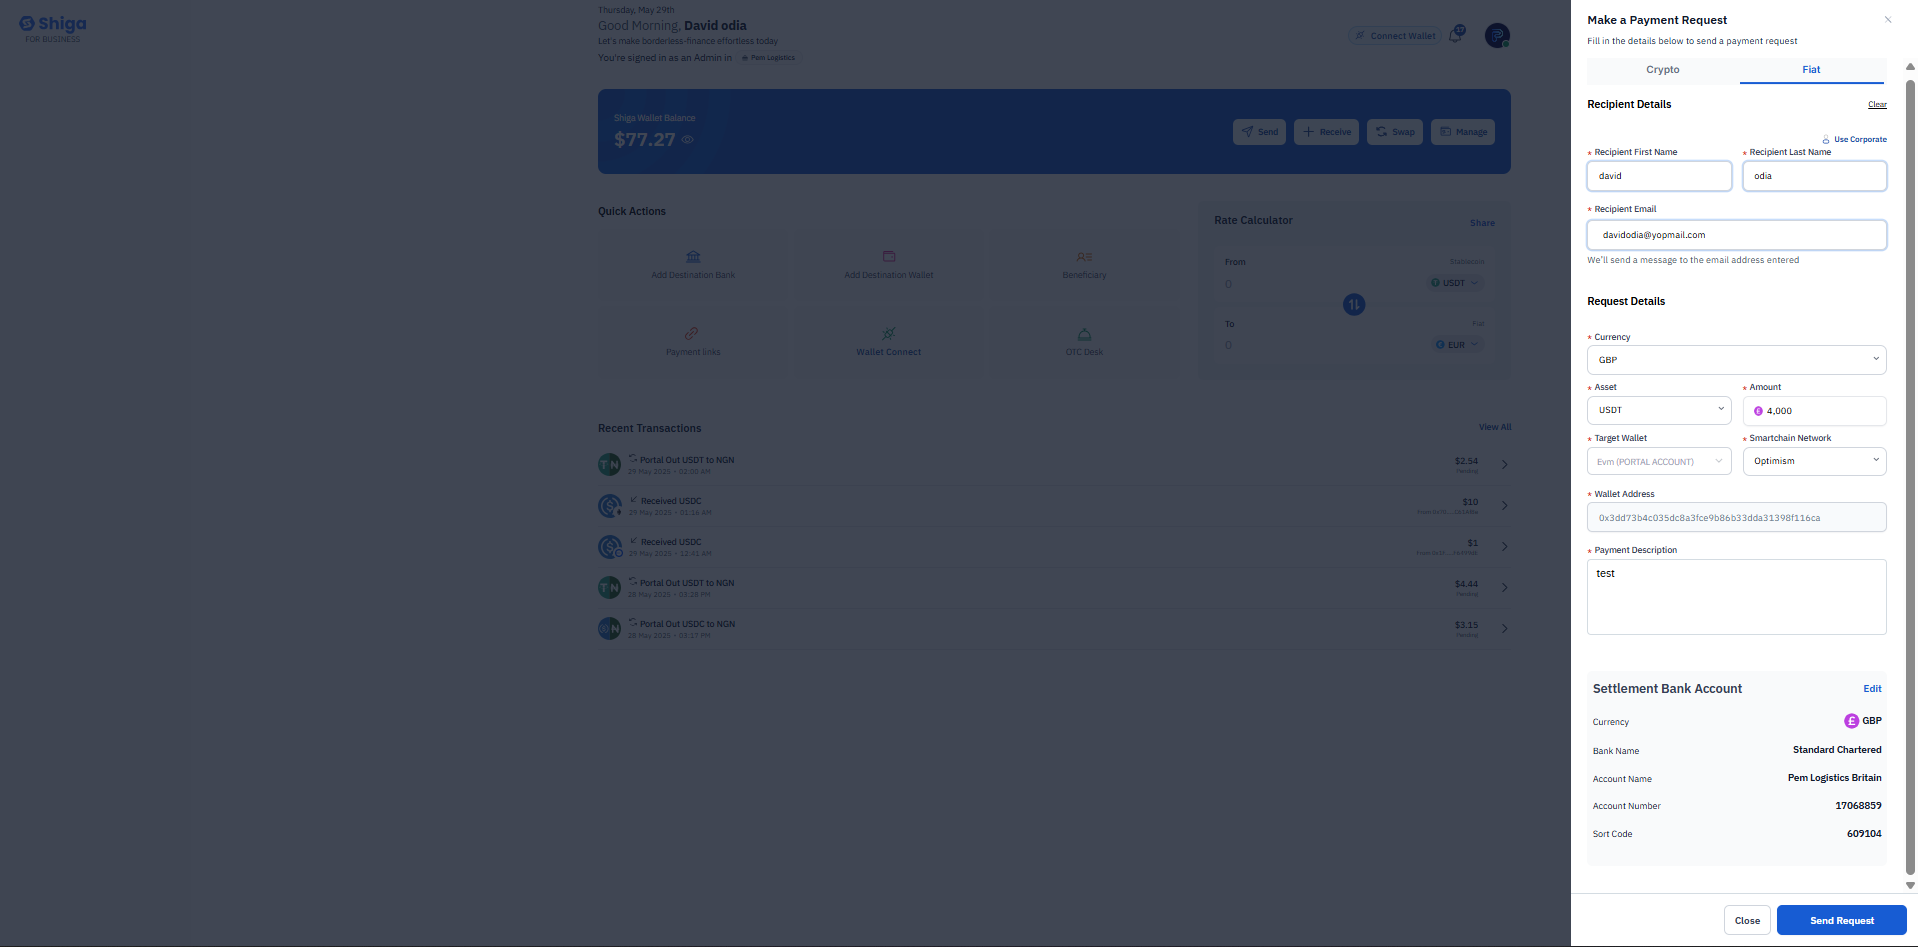
Step 2: Fill in Recipient Details
-
Recipient Information:
- Enter the recipient’s First Name (e.g., “david”).
- Provide the recipient’s Email (e.g., “olivera@gmail.com.”).
Step 3: Configure Request Details (Fiat-to-Crypto)
- Currency & Asset:
- Select the fiat currency (e.g., “GBP”).
- Choose the crypto asset for payment (e.g., “USDT”).
- Target Wallet:
- Select a wallet type
- Payment Description:
- Add a note (e.g., “test”) for reference.
Step 4: Set Up Settlement Bank Account
- Bank Details:
- Select the Currency (e.g., GBP).
- Enter the Bank Name (e.g., “Standard Chartered Prem Logistics”).
- Provide Account Name, Account Number, and Sort Code (if required).
- Reference Details:
- Include any reference codes (e.g., “TYM08579 #097624”).
Step 5: Review & Send Request
- Double-check all details (recipient email, wallet address, bank info).
-
Click “Send Request” to generate the payment link.

Step 6: Recipient’s Payment Process
The recipient receives a Payment Summary (as shown in the second screenshot):- Amount & Network:
- They must send the exact crypto amount (e.g., “3.00 USDT on Optimism”).
- Recipient Address:
- A wallet address is provided (e.g., “0x3d873b4c035dc8a3fce9b86b33dda3139f81dca”).
- Instructions:
- Copy the address or scan the QR code.
- Send the crypto via the specified network (e.g., “Optimism”).
-
Click “Payment Complete” and submit the transaction hash.
For Fiat Settlements:
- The recipient pays in crypto, but funds are converted and deposited into your bank account.
- Ensure bank details are accurate to avoid failed transfers.