

Create a Reusable Payment Link
A reusable link can be shared with anyone and used more than once — good for tip jars, donation pages, or a storefront link you hand out repeatedly. You choose whether payers pick their own amount or you fix it in advance.This is a different guide from Create a One-Time Payment Link, Payment Link Details, Archive a Payment Link, and Restore a Payment Link.
1. Choose the link type
Starting a new payment link opens “Create payment link” — “Set up a link to request or collect a payment” — with a stepper across the top: Link type, Payment details, Review. The first question is “What type of link do you need?”, with a banner reminding you: “Anyone can pay. No Shiga account needed.”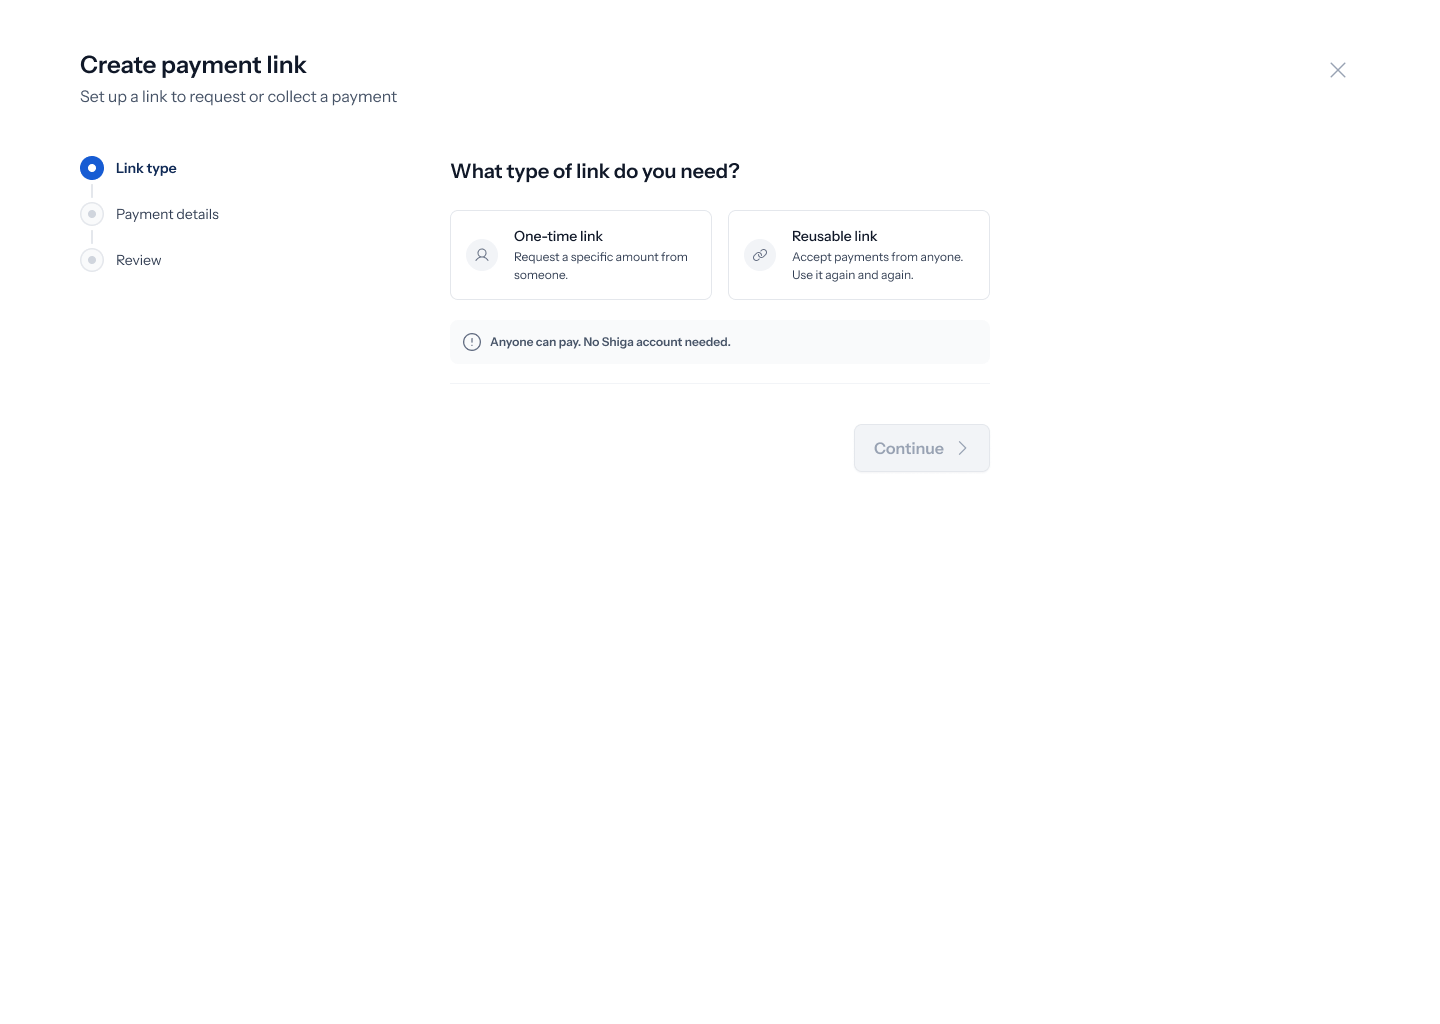
2. Name the link
With Reusable link selected, a single Link title field appears (placeholder “e.g., Tips, Donations, Medical fund”) — unlike a one-time link, there’s no “who is this for” field, since a reusable link isn’t aimed at one specific person. Fill in a title, e.g. “London Store Payments”, and tap Continue.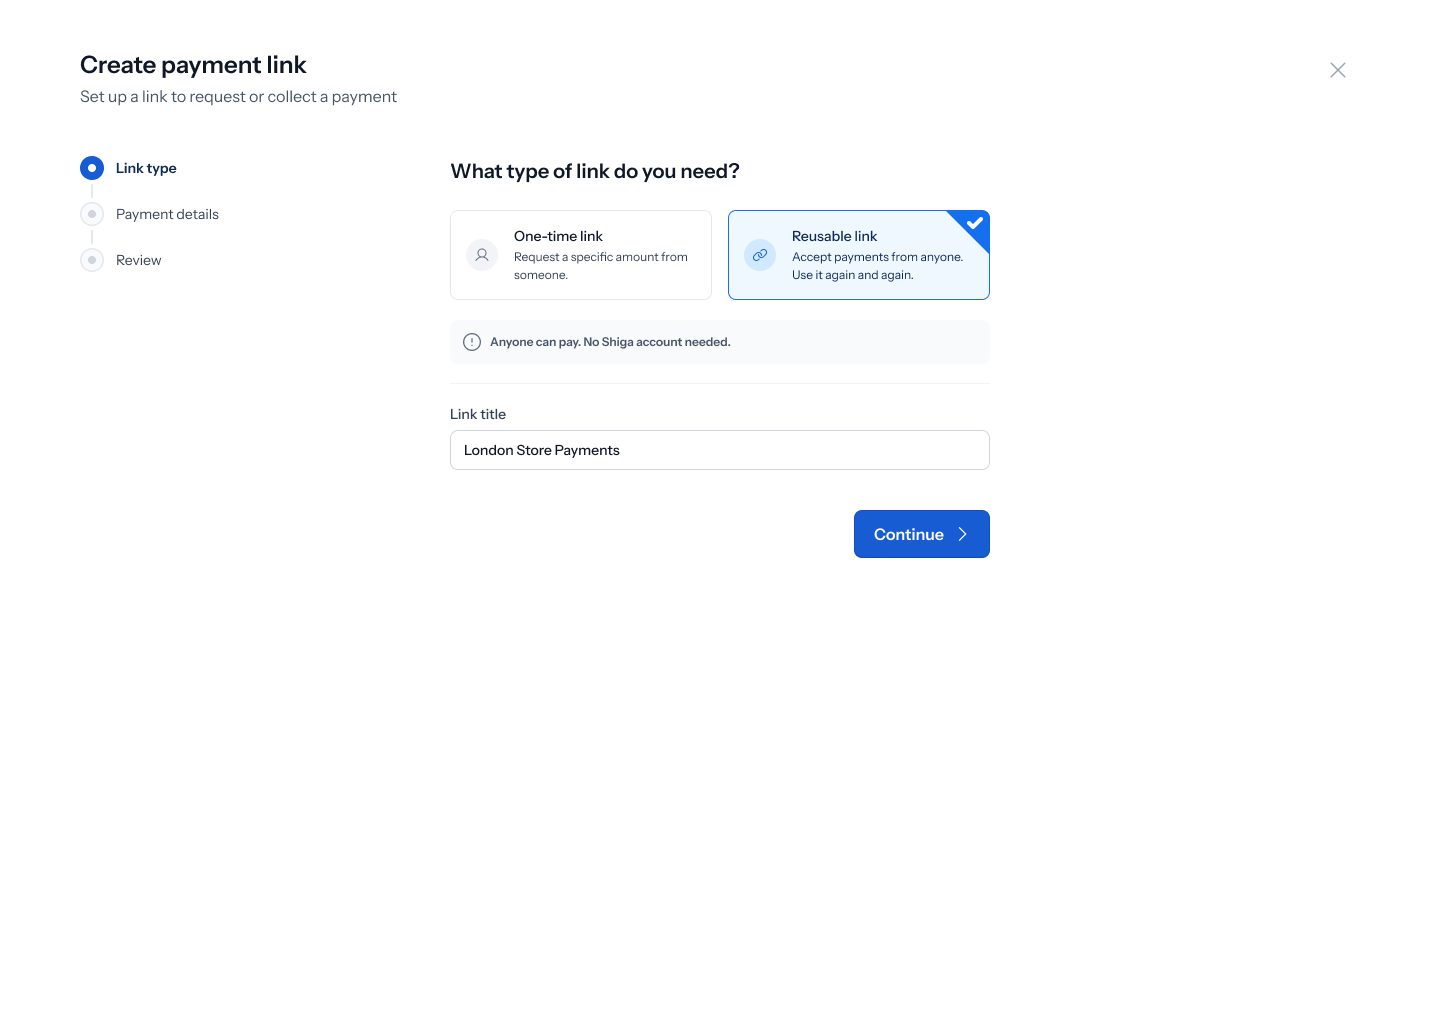
3. Choose how the amount is set
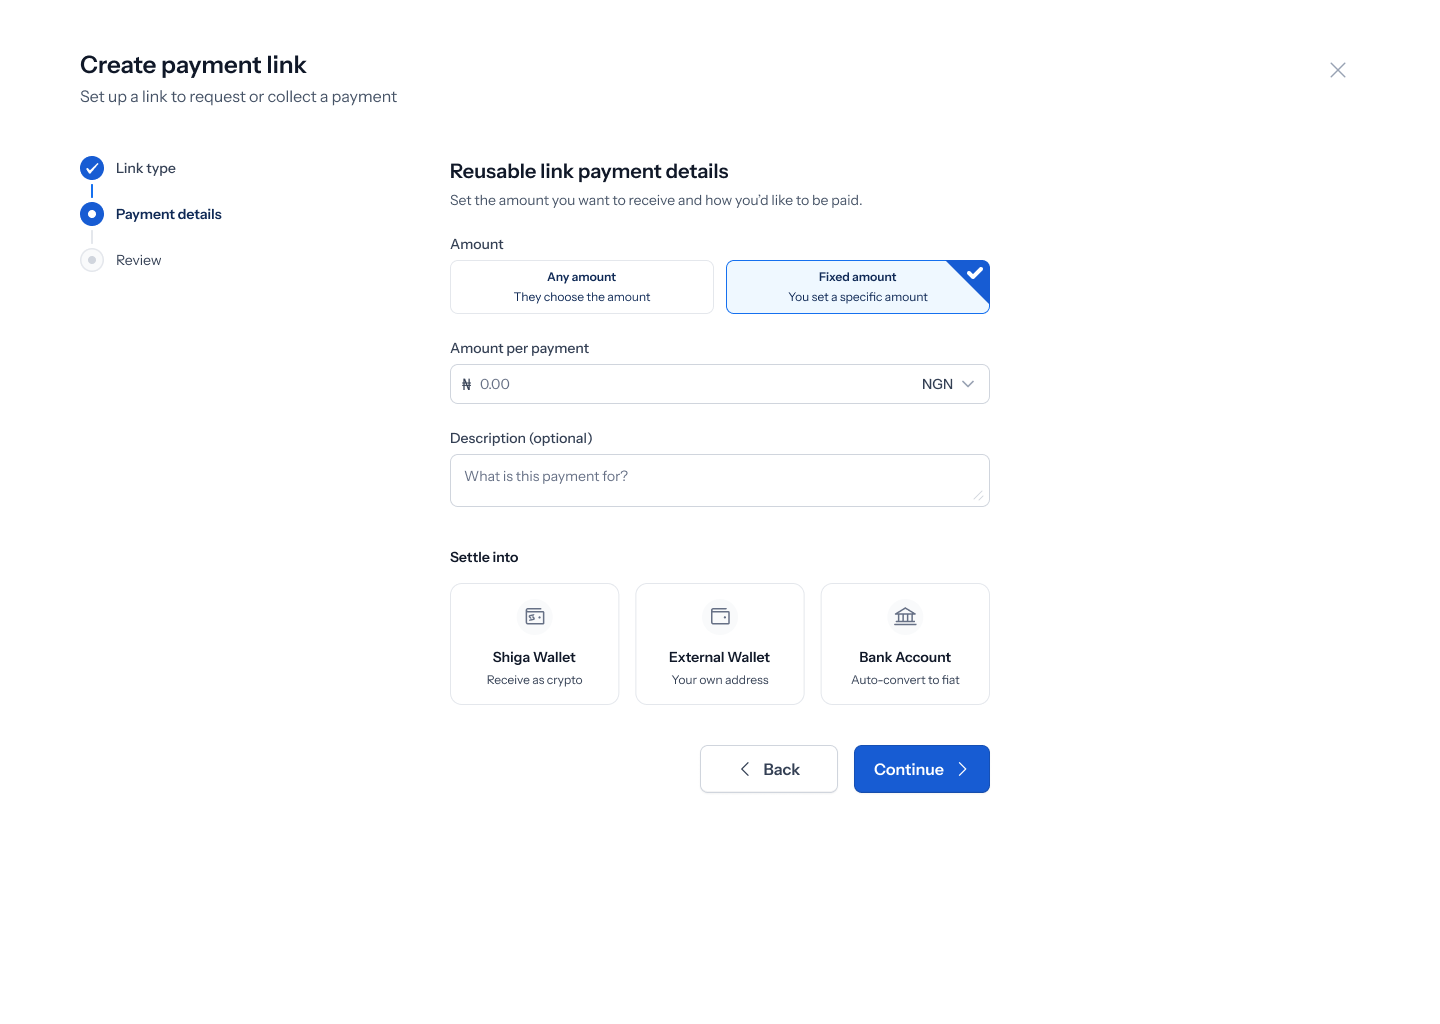
The “Reusable link payment details” screen — “Set the amount you want to receive and how you’d like to be paid” — starts with two option cards: Any amount (“They choose the amount”) and Fixed amount (“You set a specific amount”).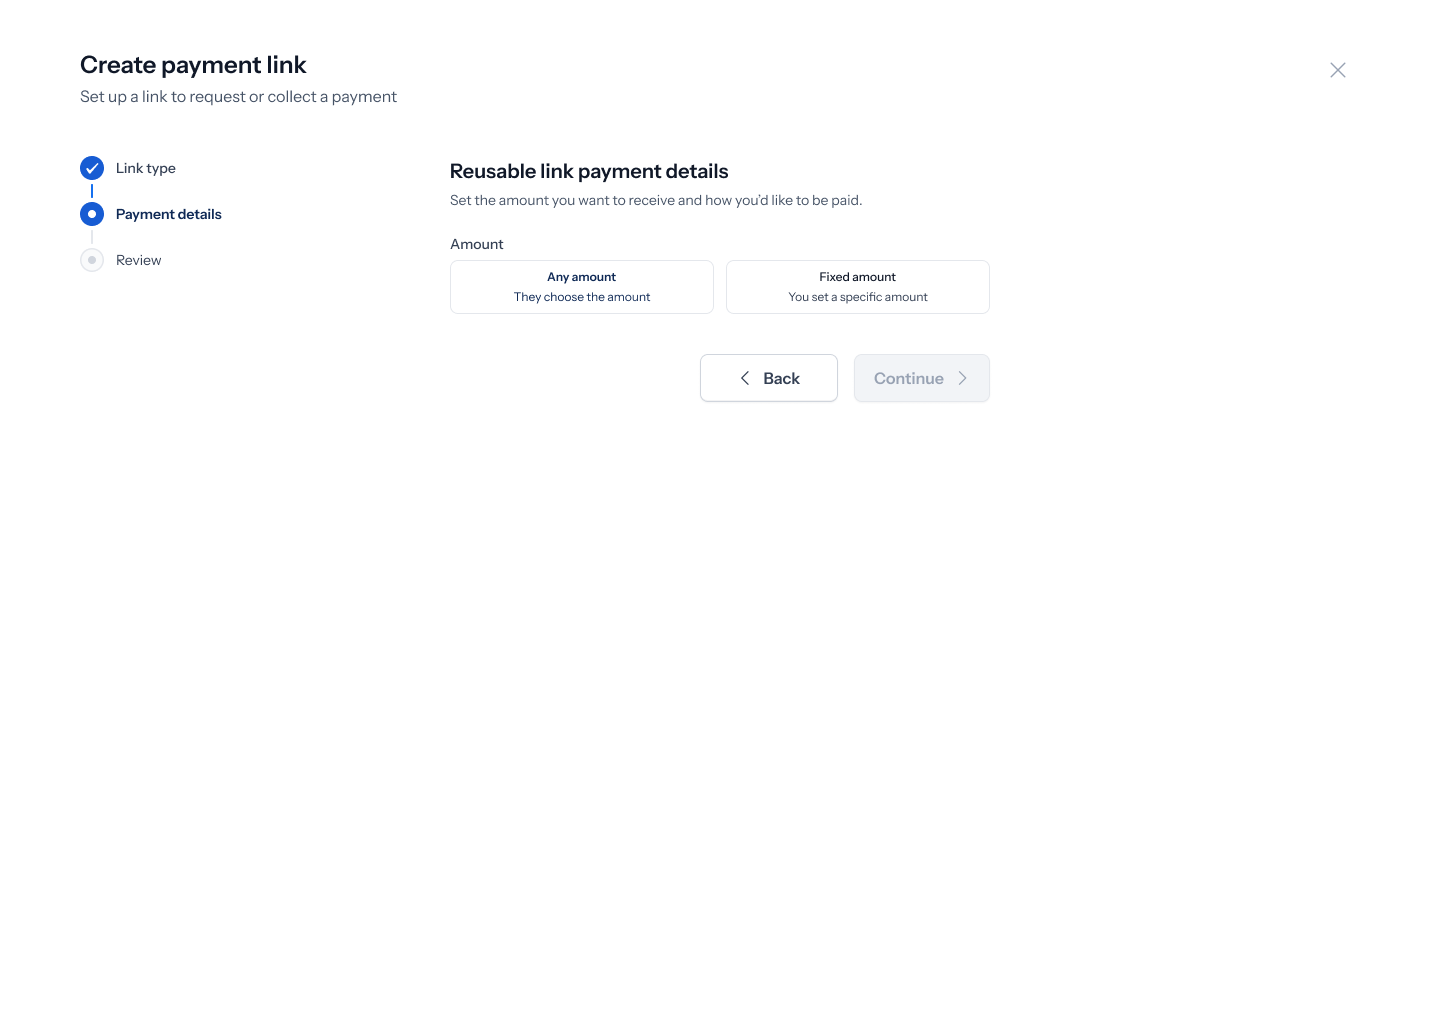 Picking Fixed amount reveals an Amount per payment field with a currency prefix (e.g. ₦) and a currency dropdown (e.g. NGN) — for example ₦20,000. Picking Any amount leaves it up to whoever pays. Either way, an optional Description field is available (placeholder “What is this payment for?”, e.g. “Payment for goods/services”).
4. Choose where the money settles
The same screen’s Settle into section offers the same three destinations as a one-time link: Shiga Wallet (“Receive as crypto”), External Wallet (“Your own address”), and Bank Account (“Auto-convert to fiat”) — with the same sub-steps for choosing an asset, entering a wallet address, or adding/choosing a bank account. See Create a One-Time Payment Link for exactly how each of those three options works, since the screens are identical between the two link types. Tap Continue once you’ve made your choice.5. Review and create the link
The Review screen summarizes everything: your amount setting (either “Any amount” or a fixed Amount per payment, e.g. ₦200,000), your link title (e.g. “For Jeremy’s Birthday” or “Dinner Split”), Type (“Reusable link” — “Accept multiple payments”), and Settle payment into (a badge showing your chosen destination, e.g. Shiga Wallet / USDT on Base). Tap Back to change anything, or Create Payment Link to finish.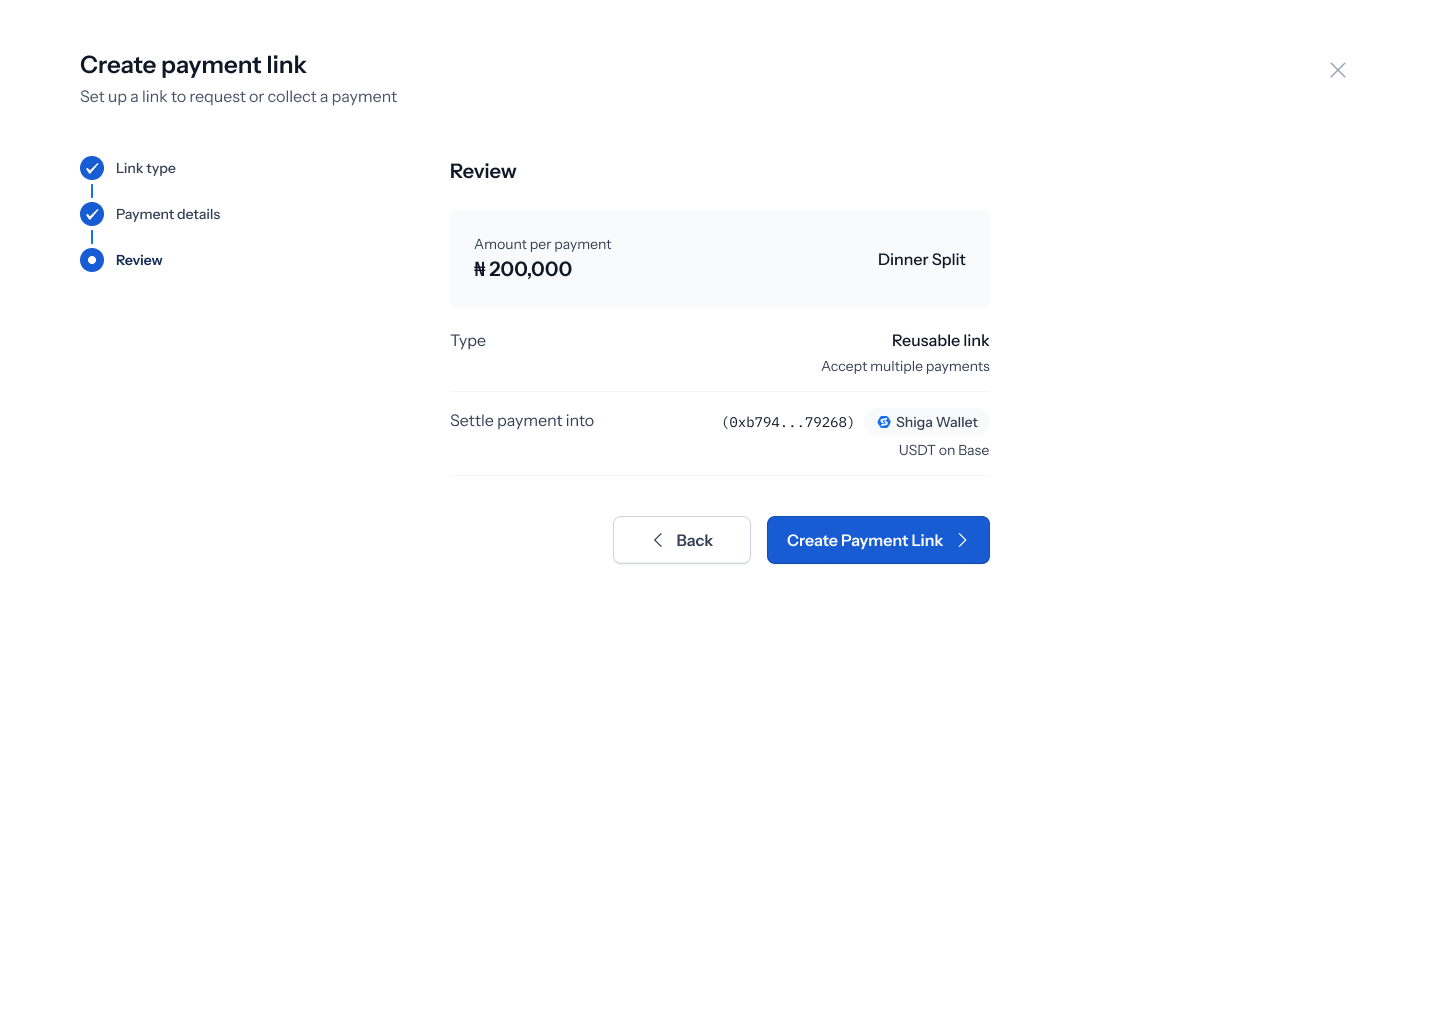
6. Share the link
Once created, “Payment link created” shows your shareable Payment link (e.g. shiga.com/pay/394949t90) with a copy icon, plus a summary of the Amount (or “Any amount”) and Settle payment into destination. Tap Go to Payment Link to view it.