

Bank Account to Bank Account (Fiat Swap)
This Move Money path covers currency exchange between bank accounts — you transfer money in one currency (e.g. Naira) from your bank, and it arrives converted into a different currency (e.g. Euro or Pound) in a recipient’s bank account. No crypto or Shiga wallet balance is involved on either end.This is a different guide from Shiga Wallet to Shiga Wallet (Swap), Shiga Wallet to External Address (Withdrawal), My Shiga Wallet to Bank Account (Offramp), External Wallet to My Shiga Wallet (Swap), External Wallet to External Address (Send), External Wallet to Bank Account (Offramp), Bank Account to My Shiga Wallet (Onramp), and Bank Account to External Address. This is the only Move Money path that’s entirely fiat-to-fiat — both ends are bank accounts, and crypto only exists briefly behind the scenes as the settlement rail.
1. Open your home screen and tap Move Money
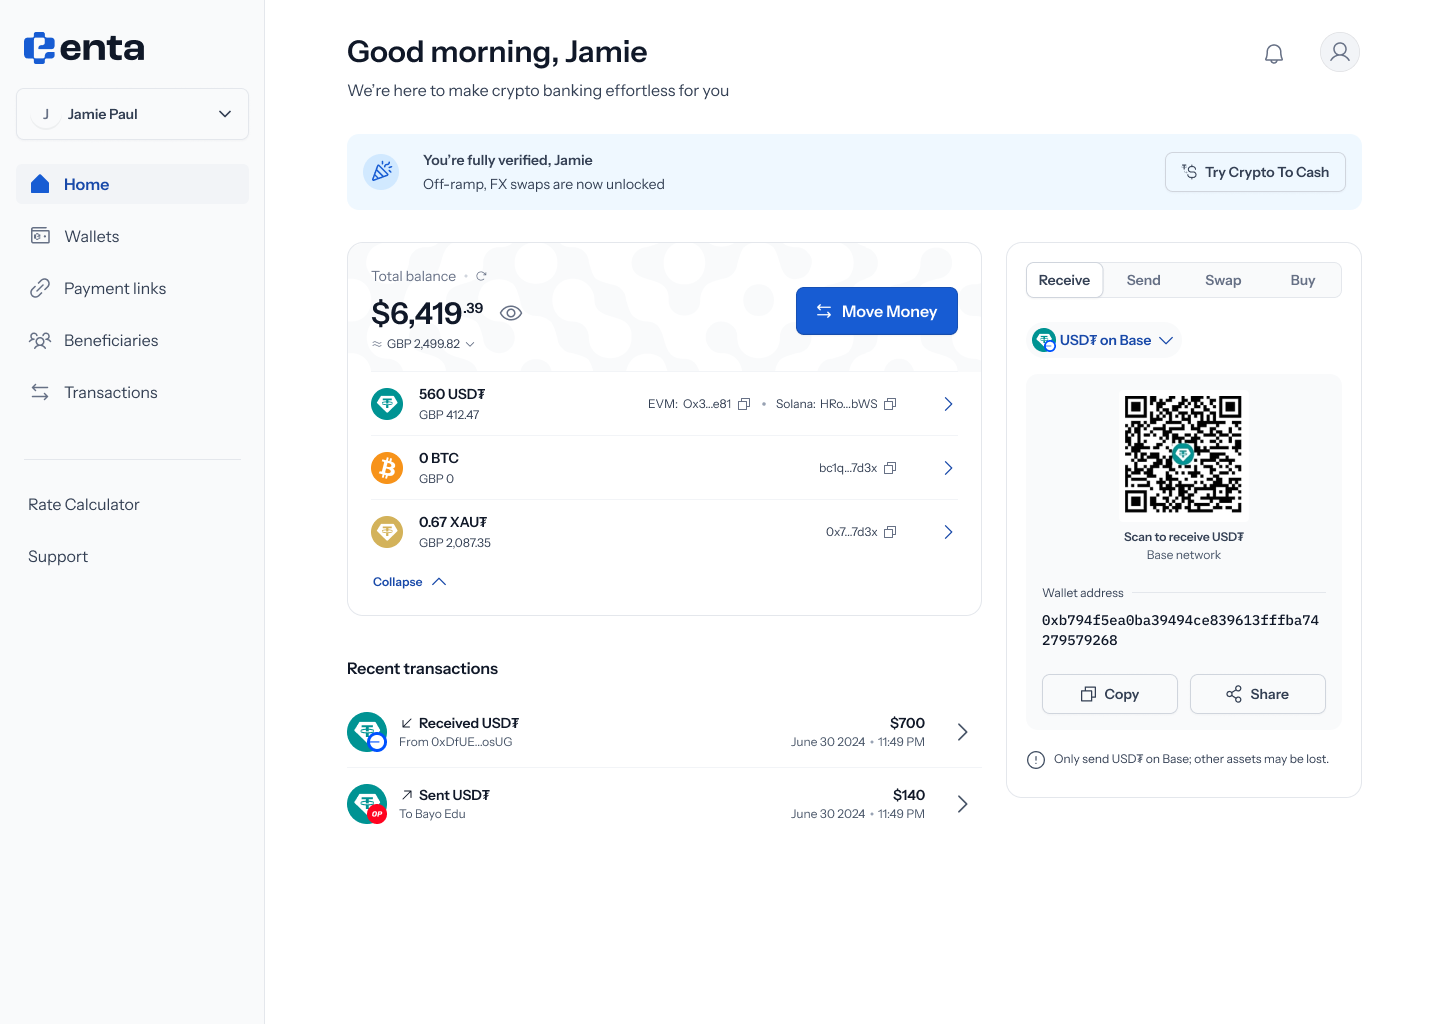 Every Move Money flow starts here, on your Enta home screen — tap Move Money to begin.
2. Choose Bank account as the source
Tapping Move Money opens a panel titled “Move money” — “Send, receive, or swap assets”. Tap Change on the From field to pick where the money’s coming from: Shiga wallet (“Choose from BTC, USDT”), External wallet (“Connect MetaMask or other wallets”), or Bank account (“Transfer from NGN, EUR, or GBP”). Pick Bank account.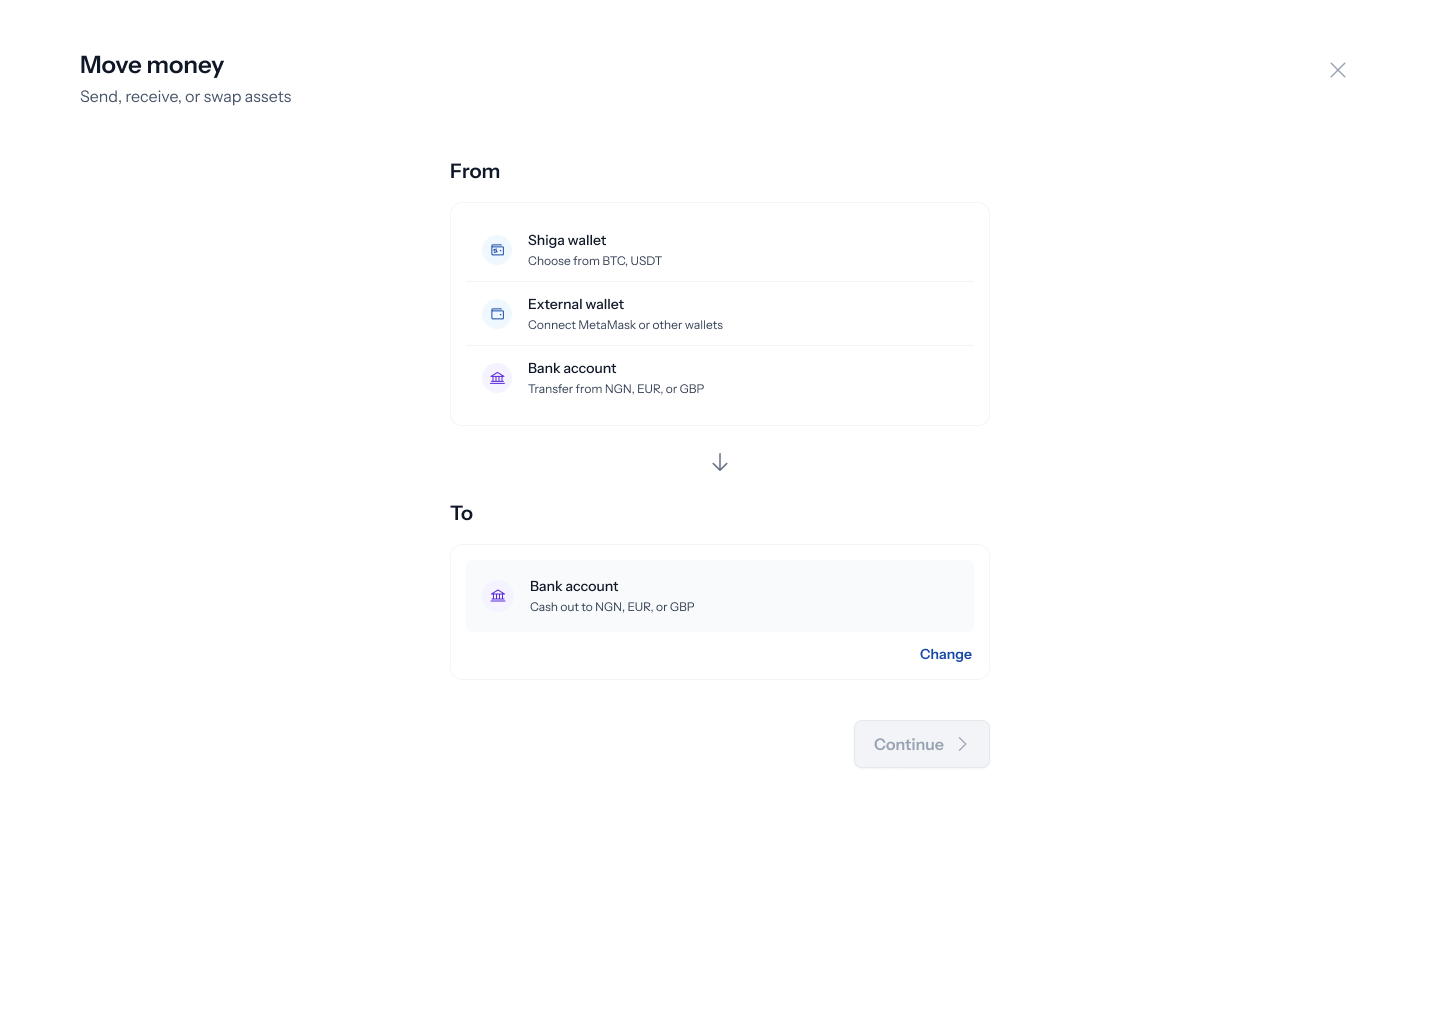
3. Choose Bank account as the destination
With Bank account set as From, tap Change on the To field to see: Shiga wallet (“Receive as BTC, USDT”), External address (“Send to any wallet address”), or Bank account (“Cash out to NGN, EUR, or GBP”). Pick Bank account again — this time as the destination.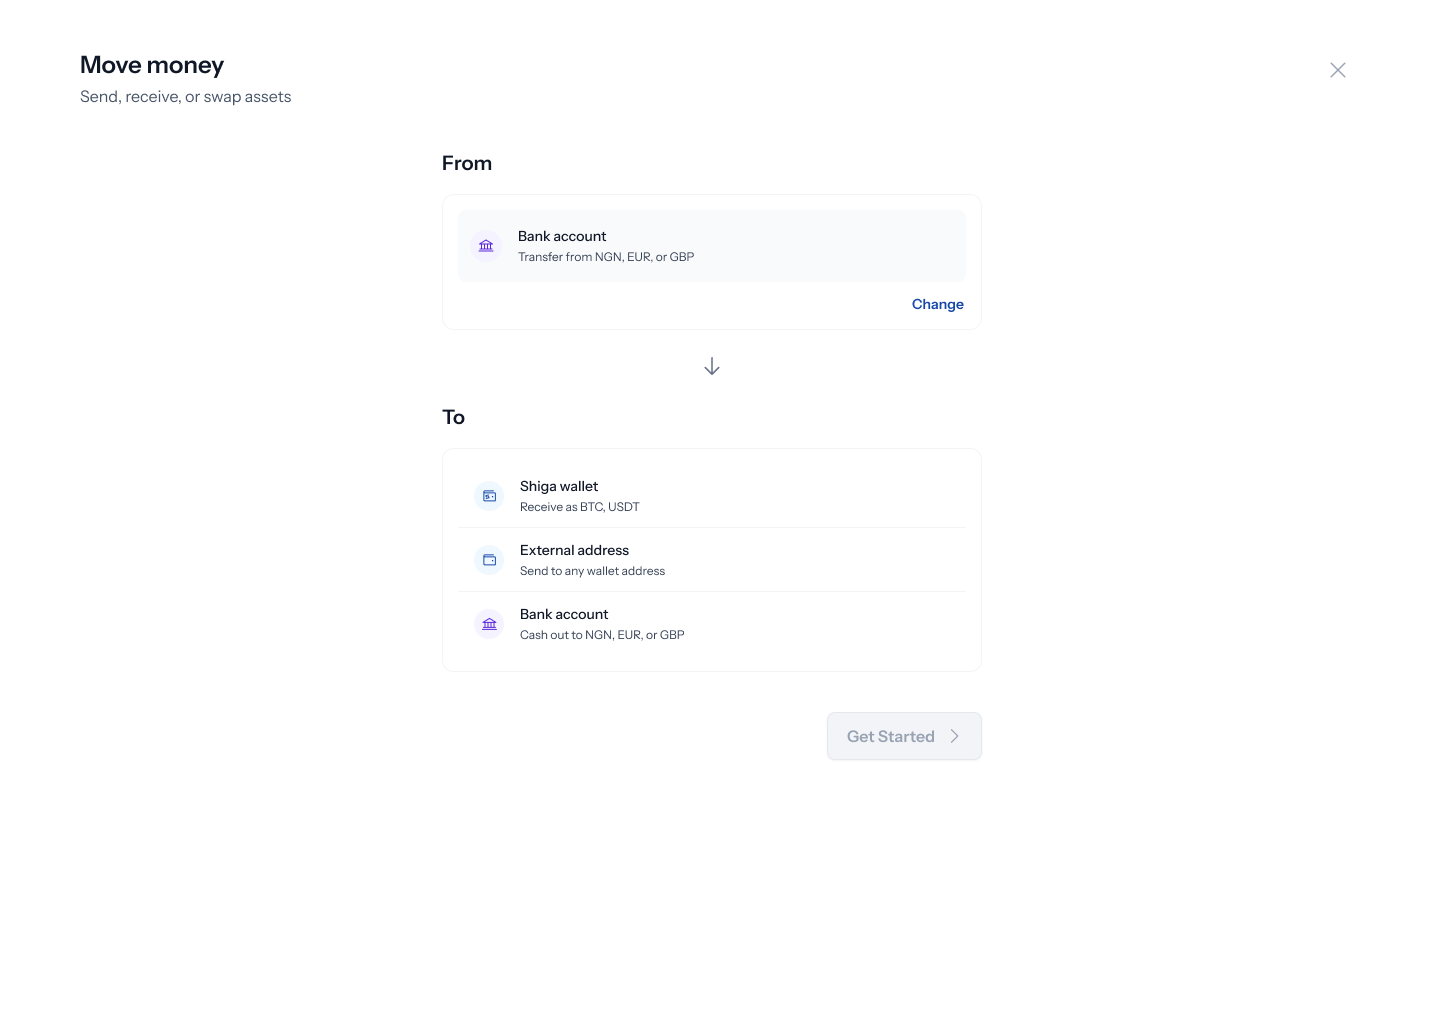 Once both fields are set, the panel updates to show your full selection, and the Get started button becomes active.
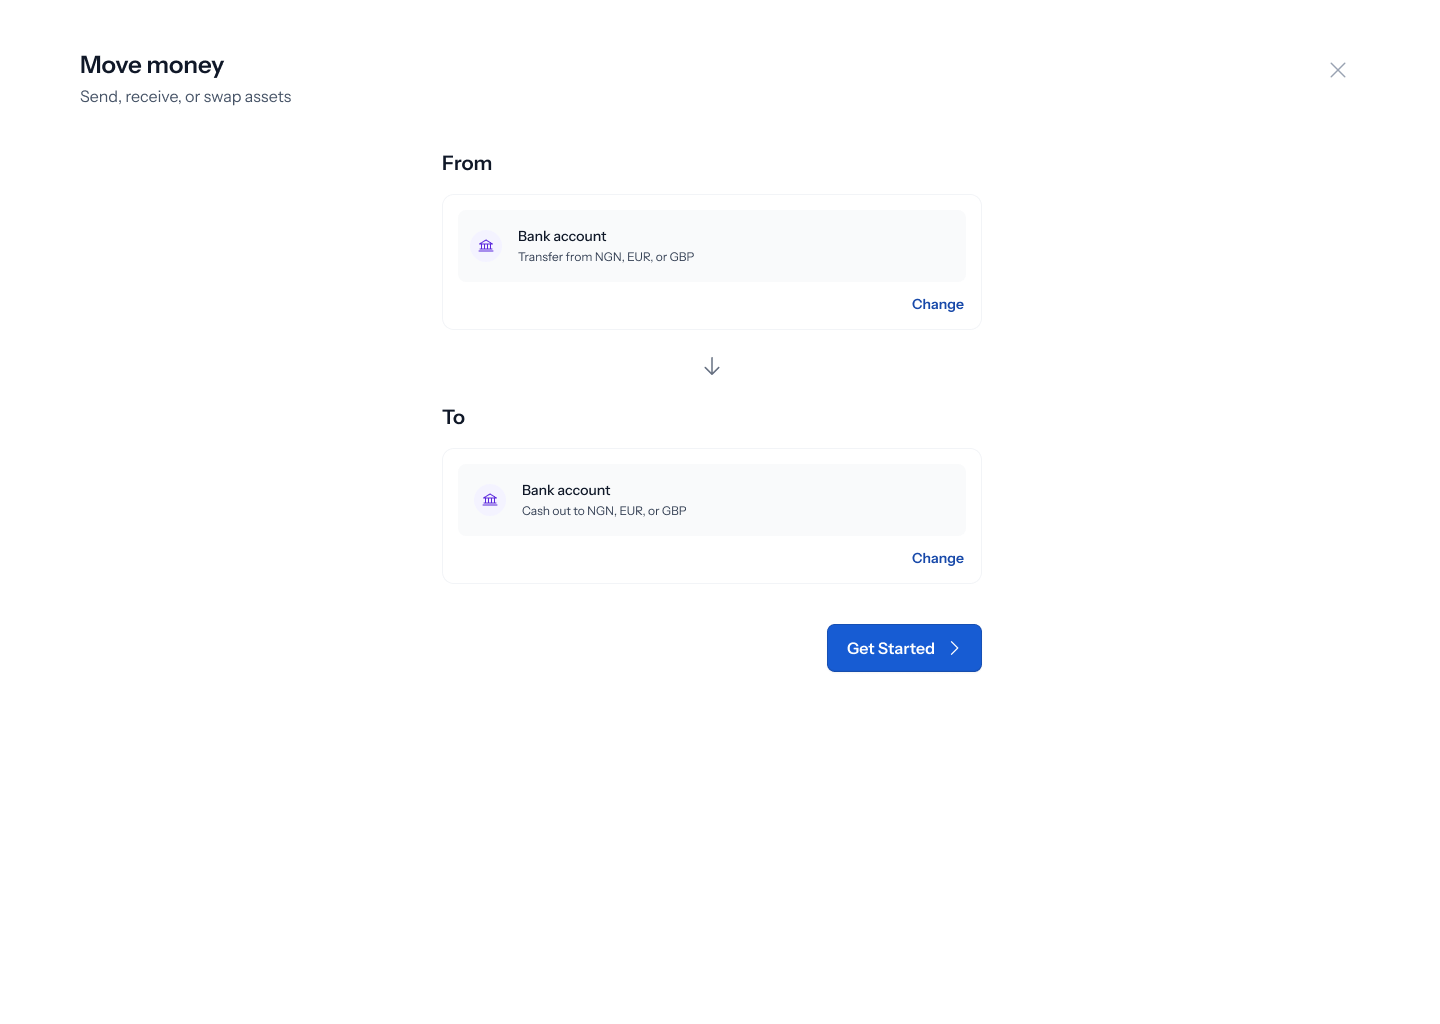
4. Choose your send and receive currencies
Tapping Get started opens a Swap currencies screen — “Currency exchange between bank accounts” — with a three-step tracker down the left: Recipient, Amount, Review & Pay. Despite the step being called “Recipient,” this first screen asks “Who are you sending to?” and starts with currency selection: a Send currency (defaulting to Naira) and a Receive currency, offered as Euro or Pound. Pick your receive currency.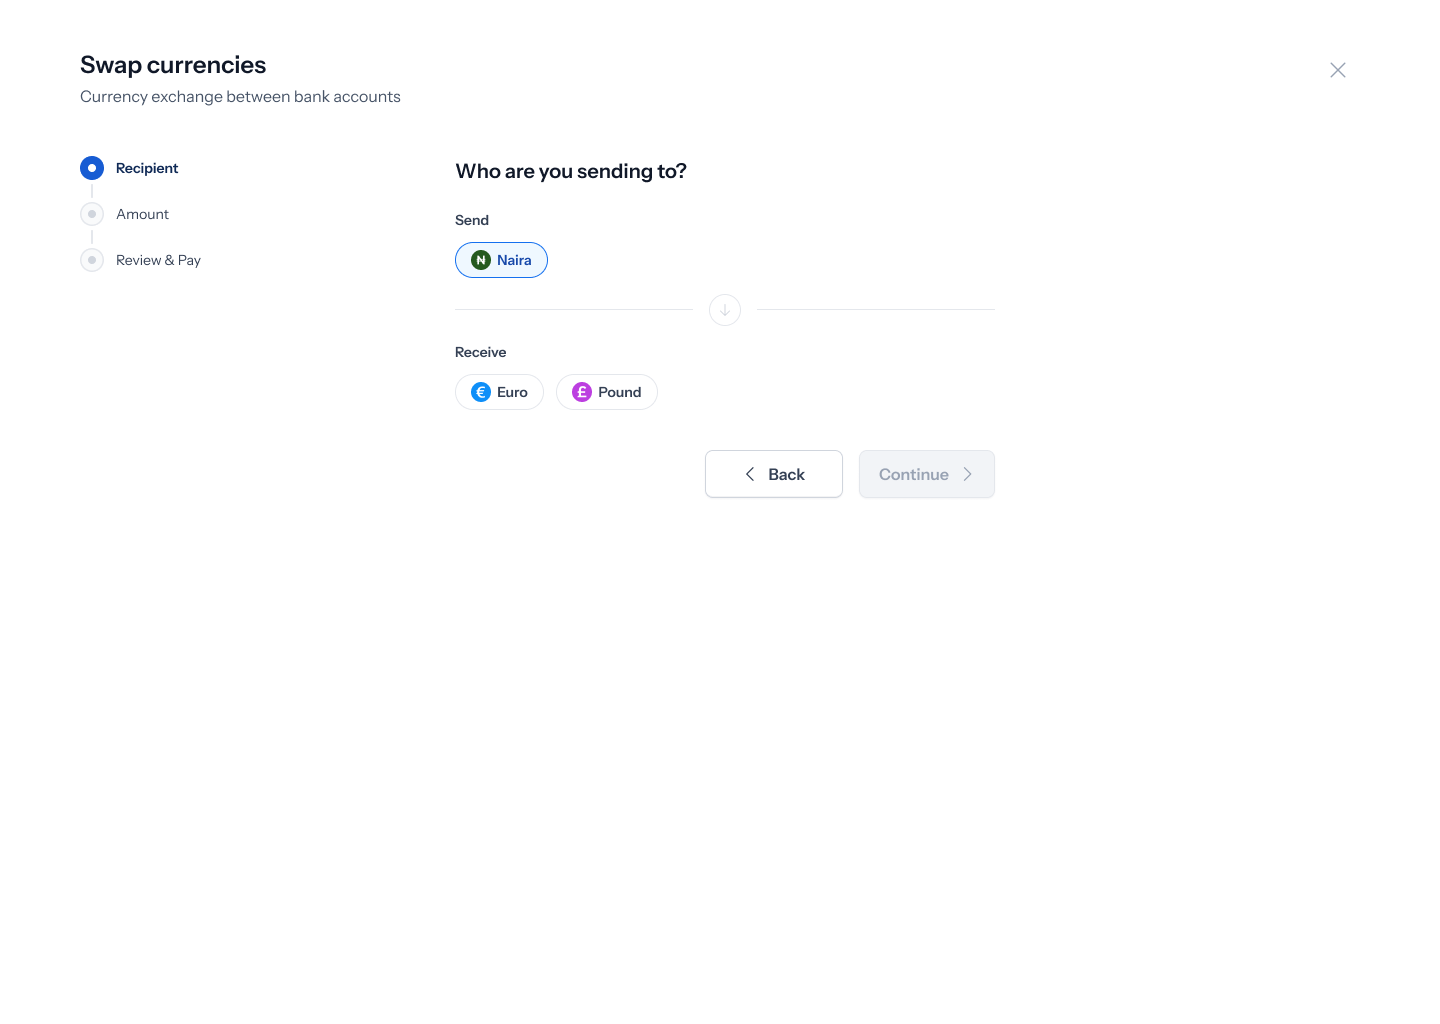
5. Add the recipient’s bank account
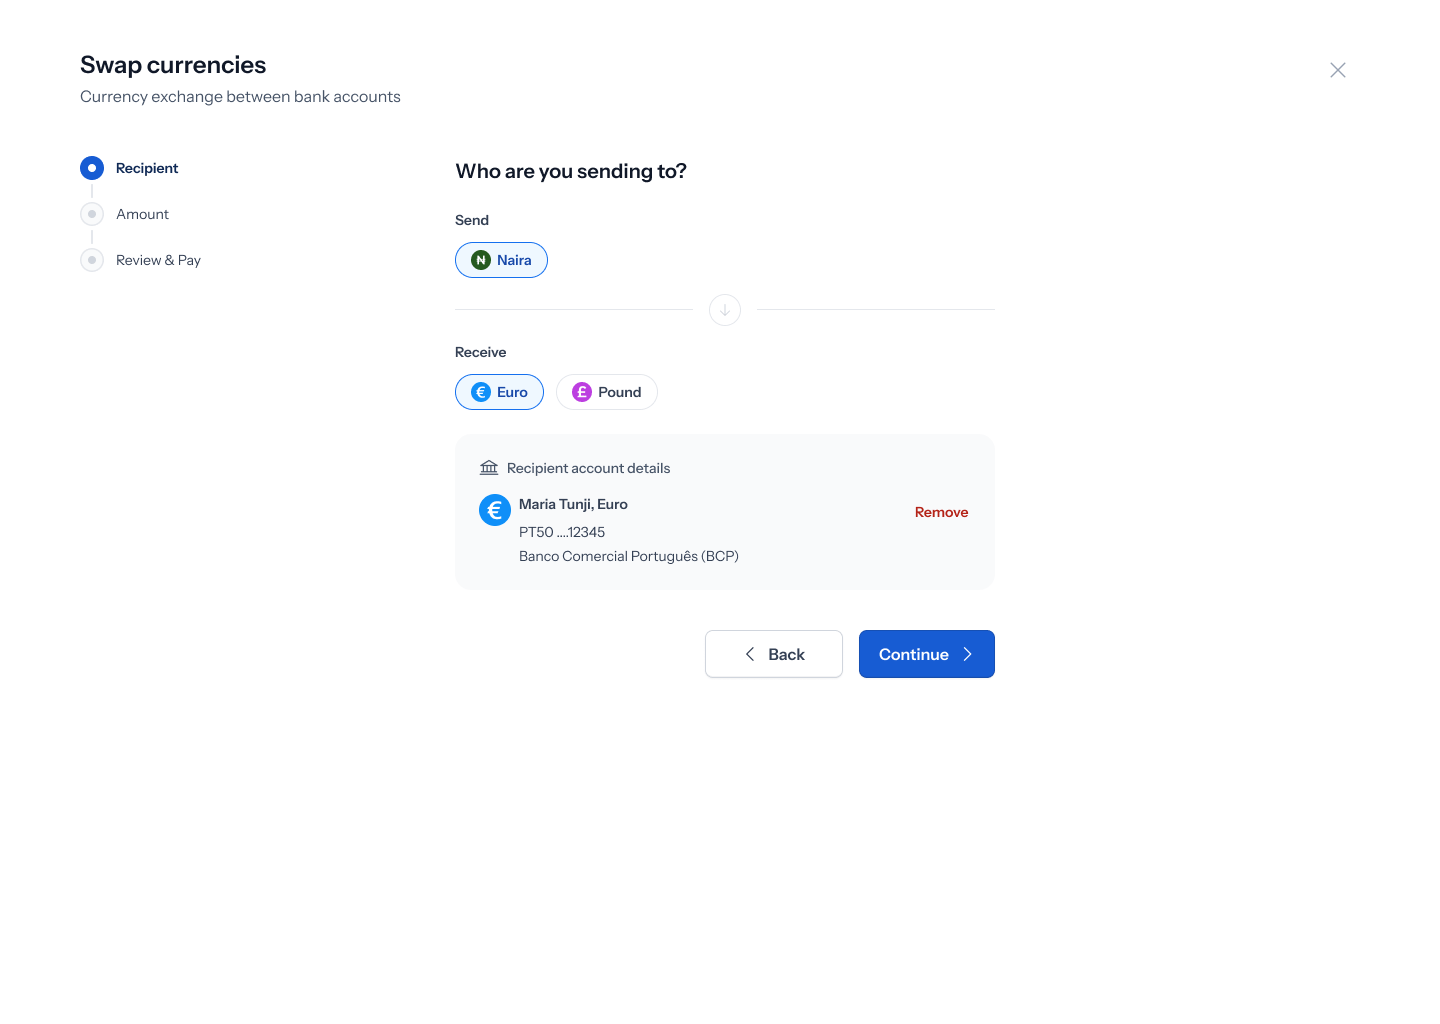
Tapping New Bank Account opens a form scoped to your chosen currency — for Euro, this means Currency (locked to your selection), Account name, Country, Bank name, and International Bank Account Number (IBAN) (with a Paste shortcut). Tap Add Bank to save it, or Cancel to back out.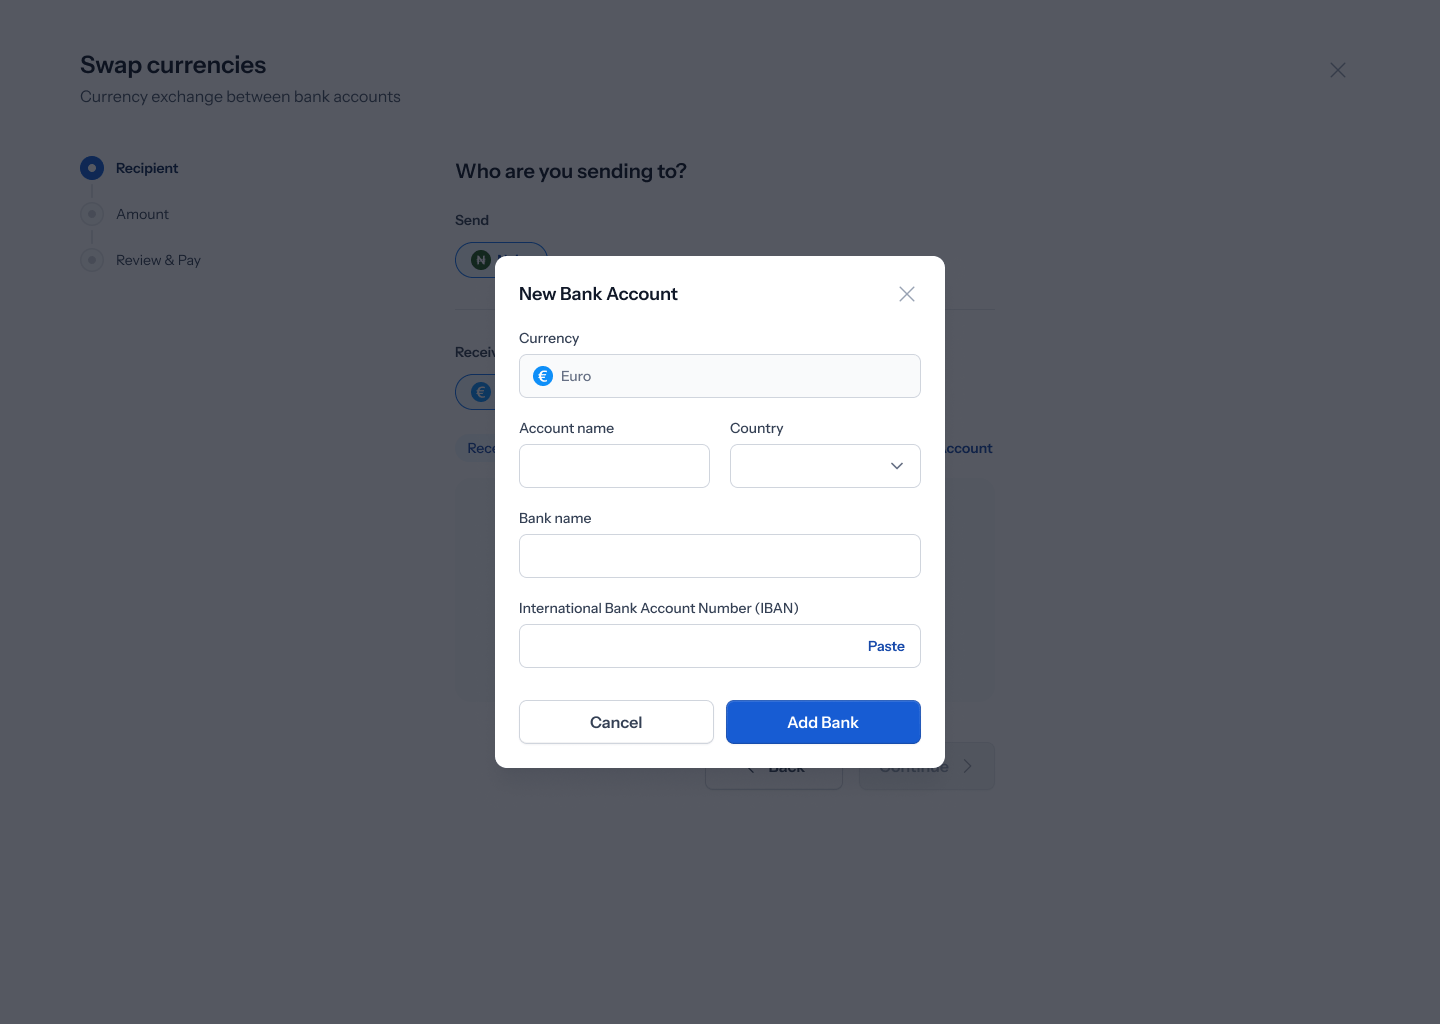
Adding a new beneficiary triggers a Verification required step — a 6-digit code sent to your email to confirm the new account, with a Resend via Email option if it doesn’t arrive. You can’t proceed until this code is entered. No screenshot is wired in for this verification modal yet since one hasn’t been uploaded.
6. Enter an amount
The Amount step shows a Send card (your source currency and amount) and a Receive card (the converted currency and amount), along with a live Rate and a To row confirming your recipient’s name, bank, and masked account — with a pencil icon to edit it. Enter how much you want to send; the receive amount calculates automatically. Tap Continue.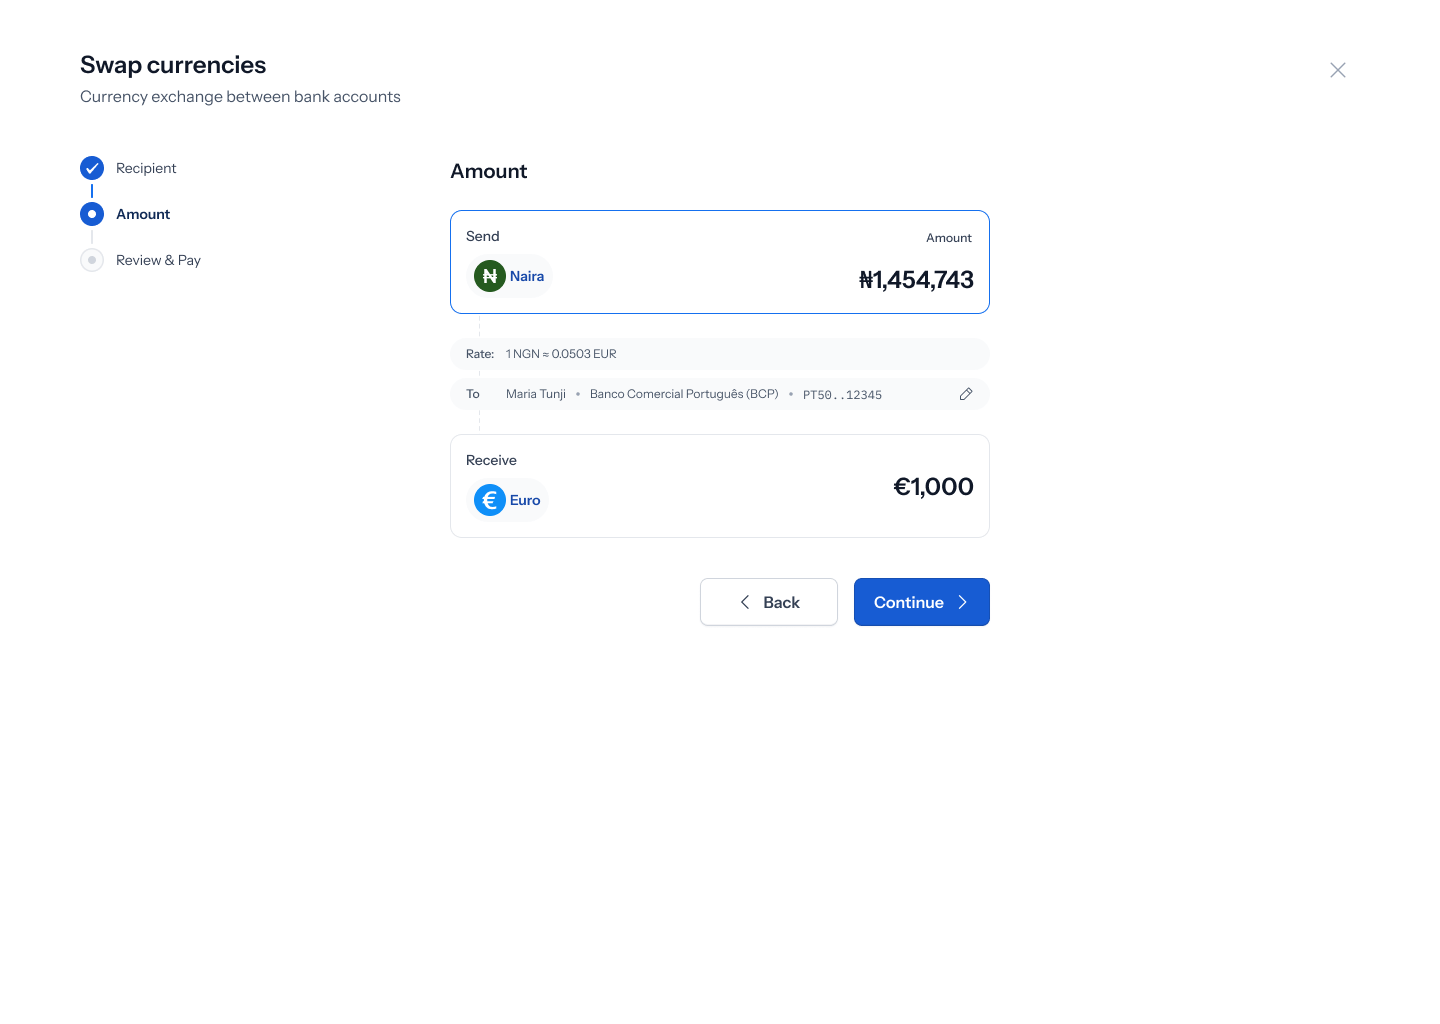
7. Review and pay
The Review & Pay step shows your swap as a summary — both currencies and amounts, the Rate, and To (your recipient and their bank, tagged Bank Account). Below that, a Transfer to this account section gives you a one-time virtual account to send your source currency to: Amount, Account name, Bank, and Account number — each with a copy icon, plus a Copy All Details shortcut. A banner spells out exactly what happens: transferring the stated amount to that virtual account triggers the converted amount being sent to your recipient. Tap Back to change anything, or Close to finish once you’ve made the transfer.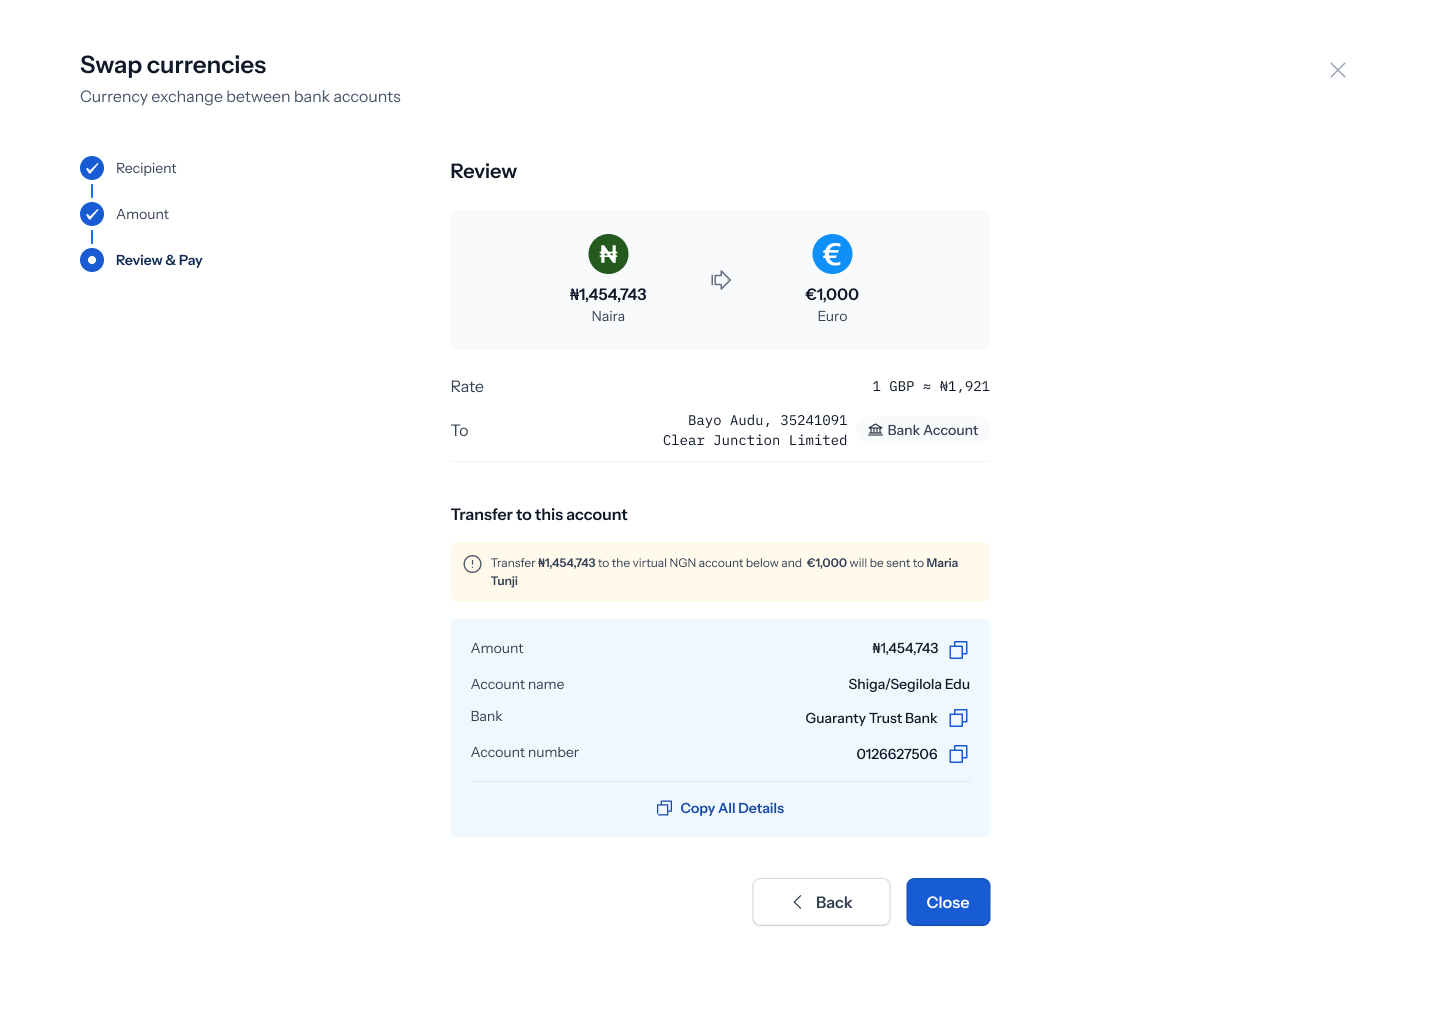
A few things in the current Figma file are worth flagging as sample-data inconsistencies rather than real behavior: the example exchange rate on the Review screen is denominated in GBP (“1 GBP ≈ ₦1,921”) even when the flow shown is a Naira-to-Euro swap, and the recipient name shown in the transfer summary (“Bayo Audu”) doesn’t match the name used earlier in the flow (“Maria Tunji”). Also, the final action button reads Close rather than Pay, despite the step being labeled “Review & Pay.” None of this affects how the real flow works — it’s just placeholder content worth a design pass.