External Wallet to Bank Account (Offramp)
This Move Money path covers cashing out crypto that’s still sitting in an external wallet — like MetaMask — straight to a bank account, without first bringing it into your Shiga wallet.This is a different guide from Shiga Wallet to Shiga Wallet (Swap), Shiga Wallet to External Address (Withdrawal), My Shiga Wallet to Bank Account (Offramp), External Wallet to My Shiga Wallet (Swap), and External Wallet to External Address (Send). Here, crypto moves from an external wallet you connect straight to a bank account, without touching your Shiga wallet balance.
1. Open your home screen and tap Move Money
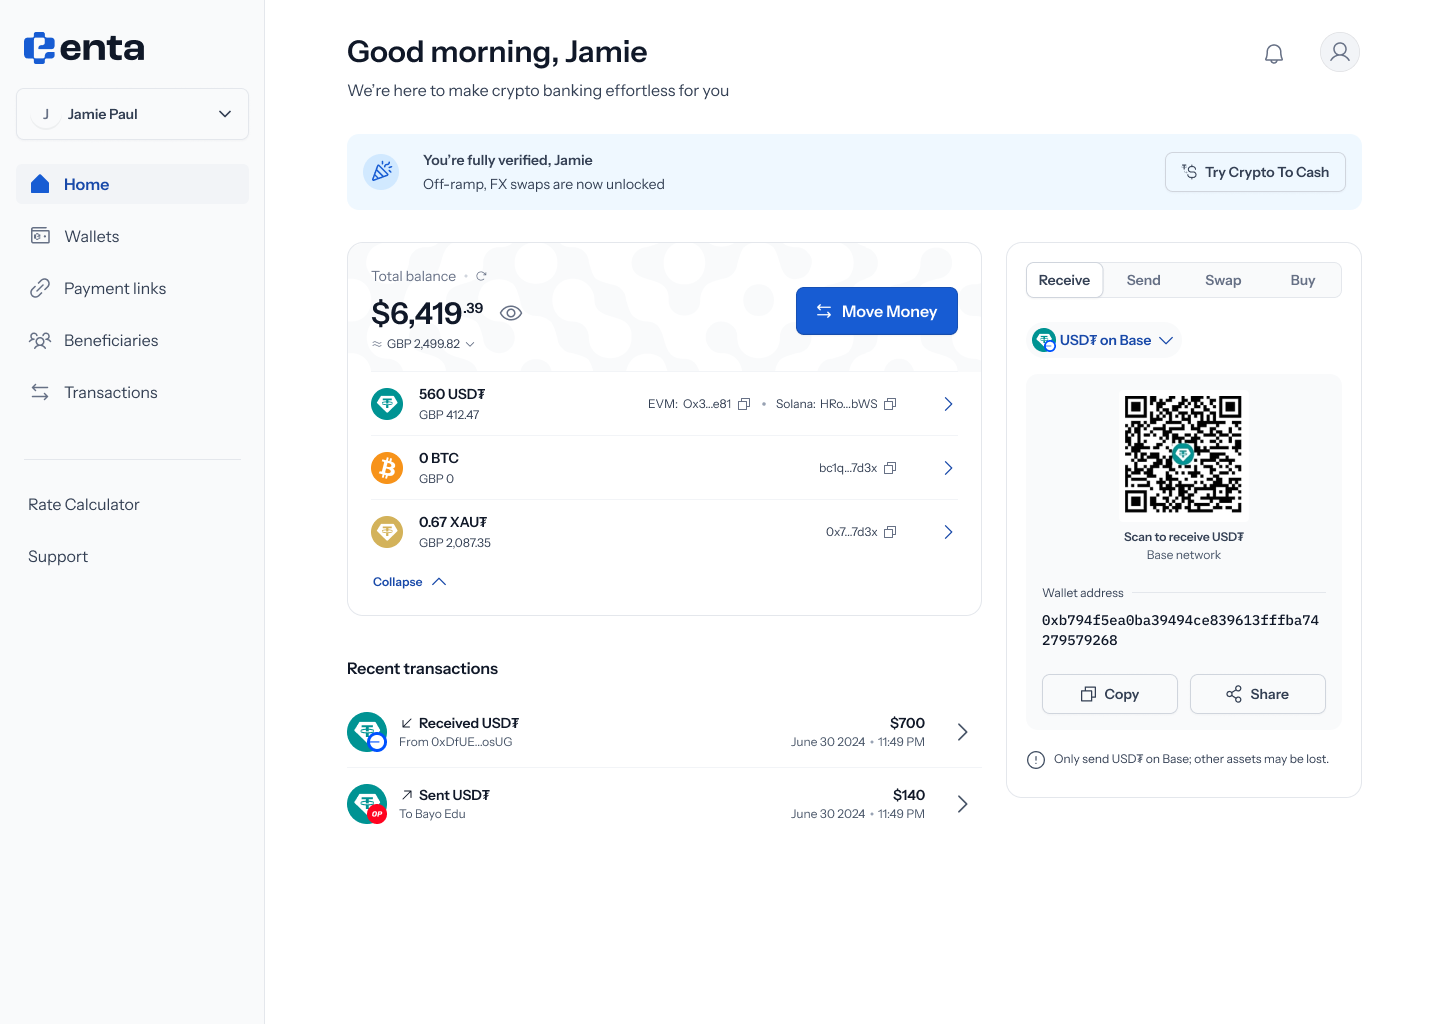 Every Move Money flow starts here, on your Enta home screen — tap Move Money to begin.
2. Choose External wallet as the source
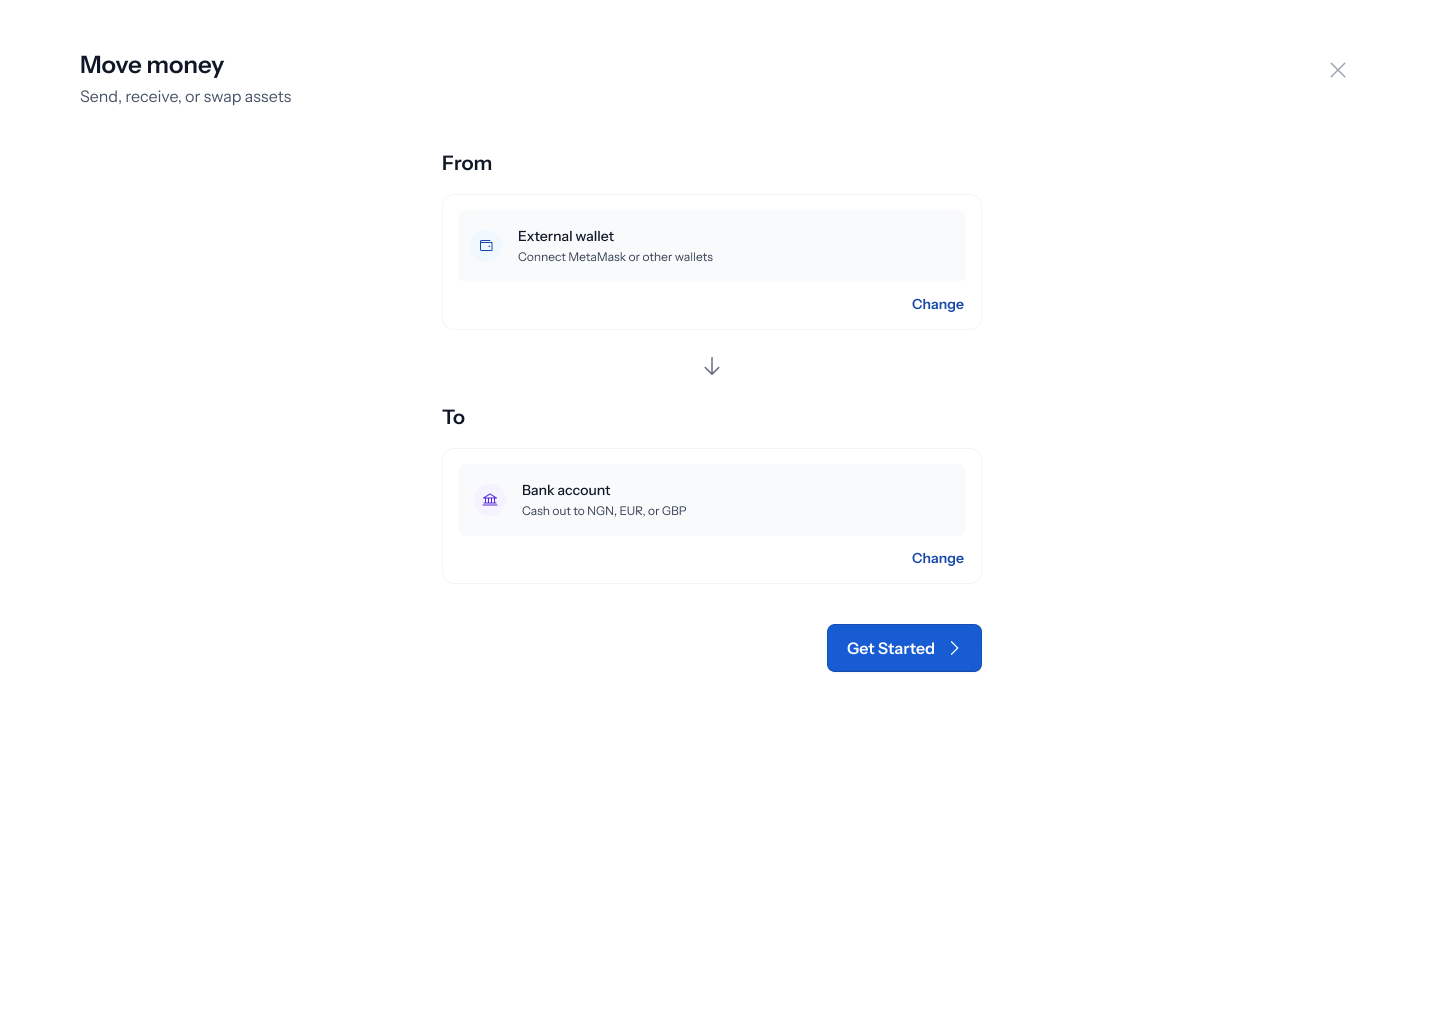
Tapping Move Money opens a panel titled “Move money” — “Send, receive, or swap assets”. Tap Change on the From field to pick where the money’s coming from: Shiga wallet (“Choose from BTC, USDT”), External wallet (“Connect MetaMask or other wallets”), or Bank account (“Transfer from NGN, EUR, or GBP”). Pick External wallet.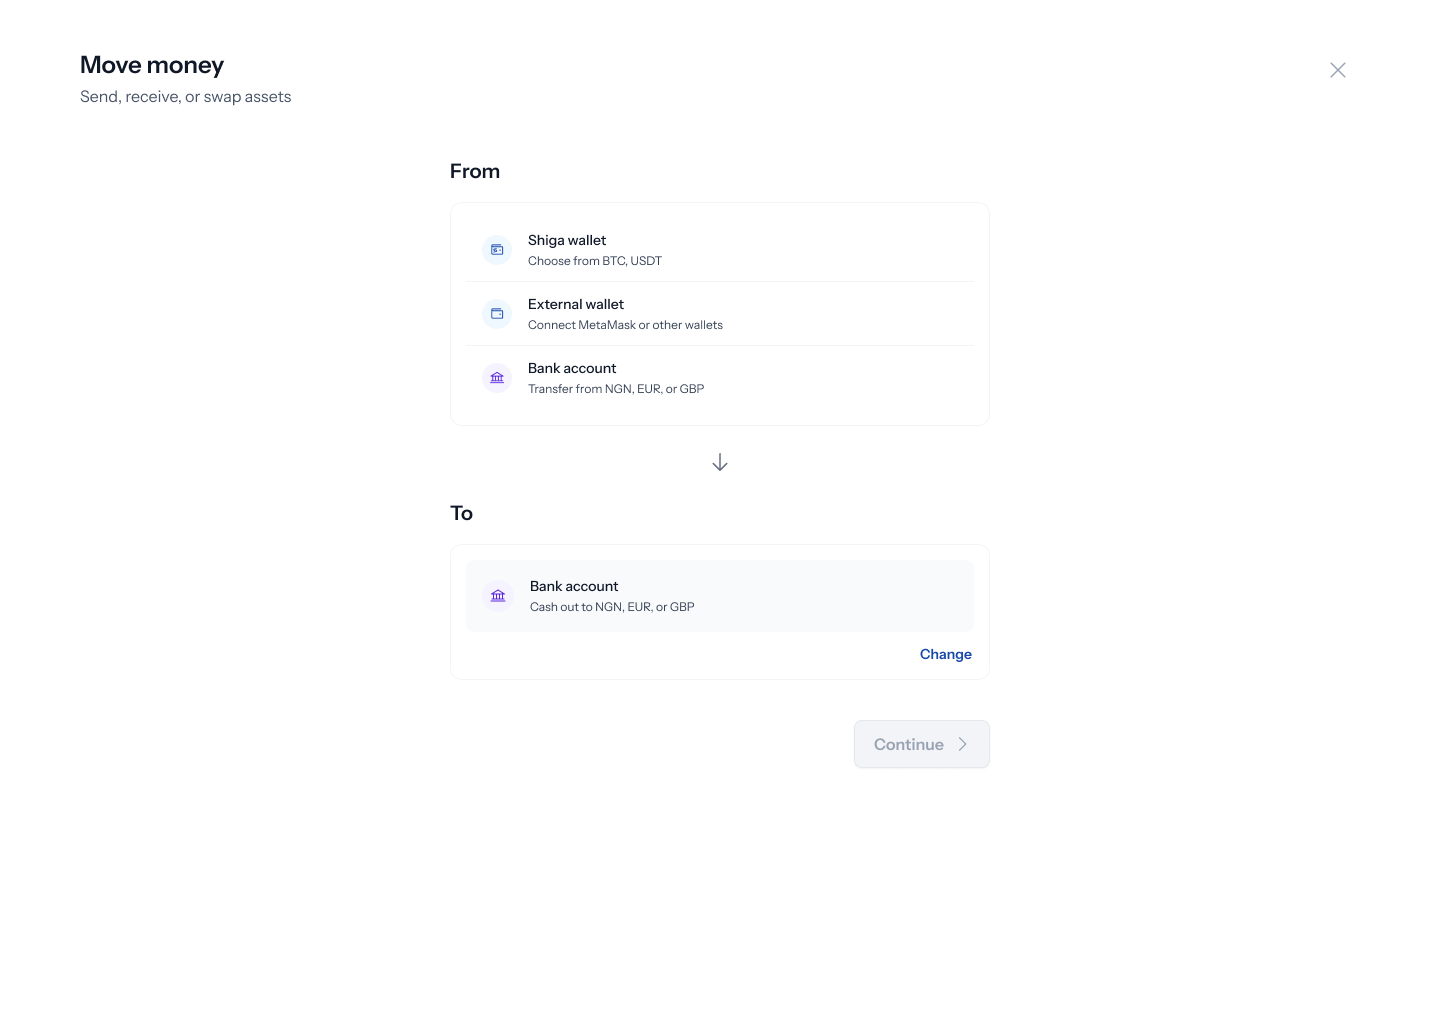
3. Choose Bank account as the destination
With External wallet set as From, tap Change on the To field to see: Shiga wallet (“Receive as BTC, USDT”), External address (“Send to any wallet address”), or Bank account (“Cash out to NGN, EUR, or GBP”). Pick Bank account.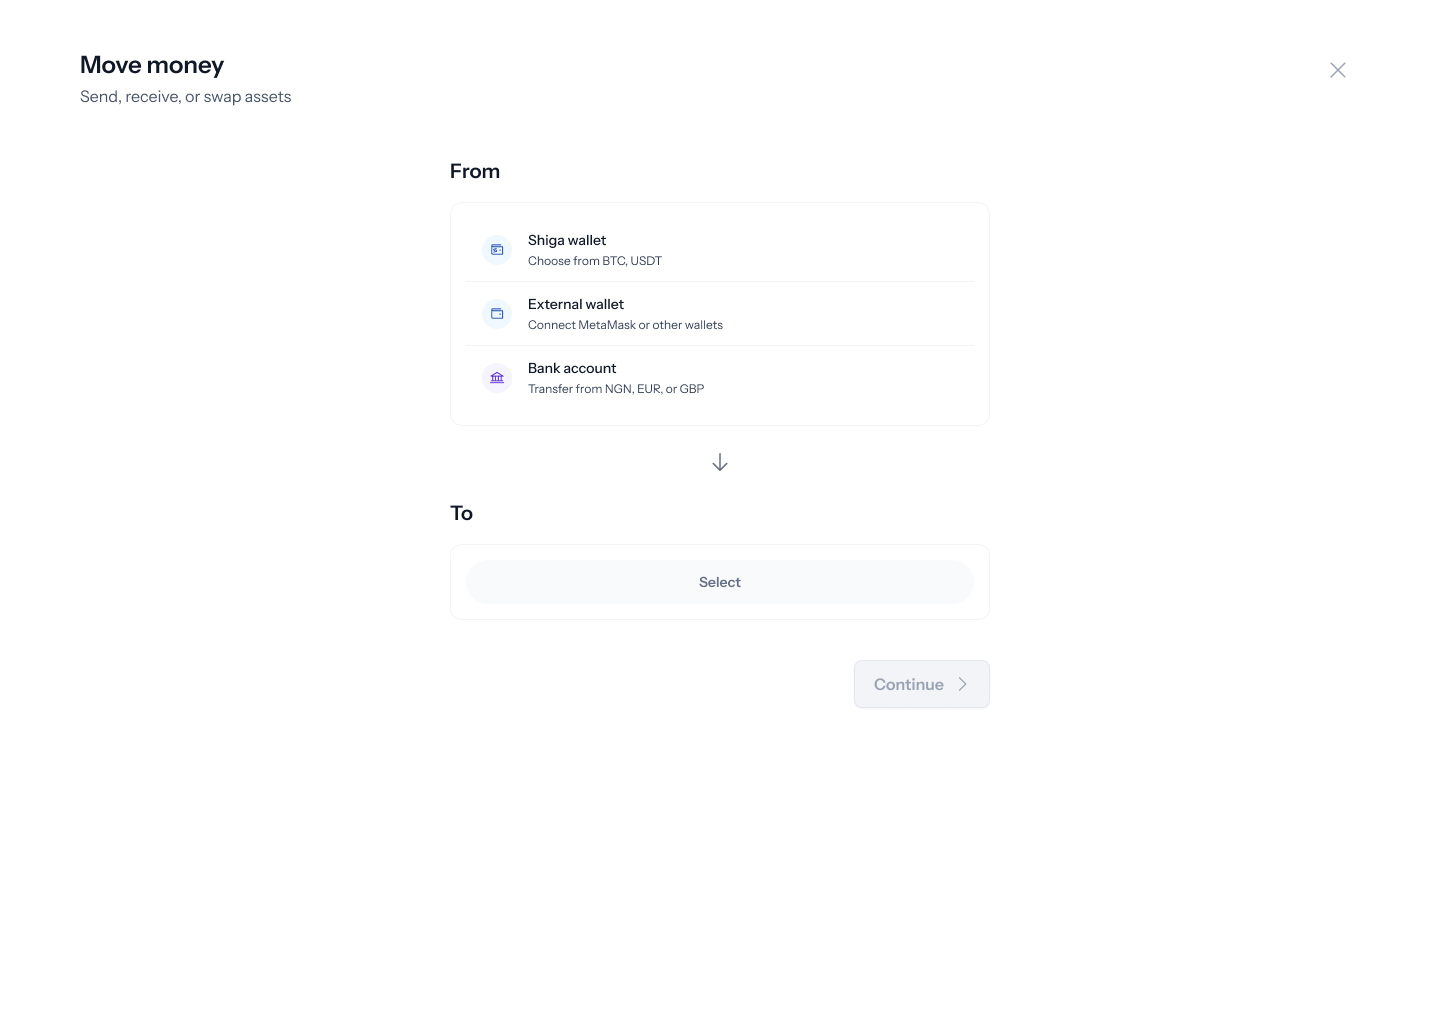
4. Enter your bank account details
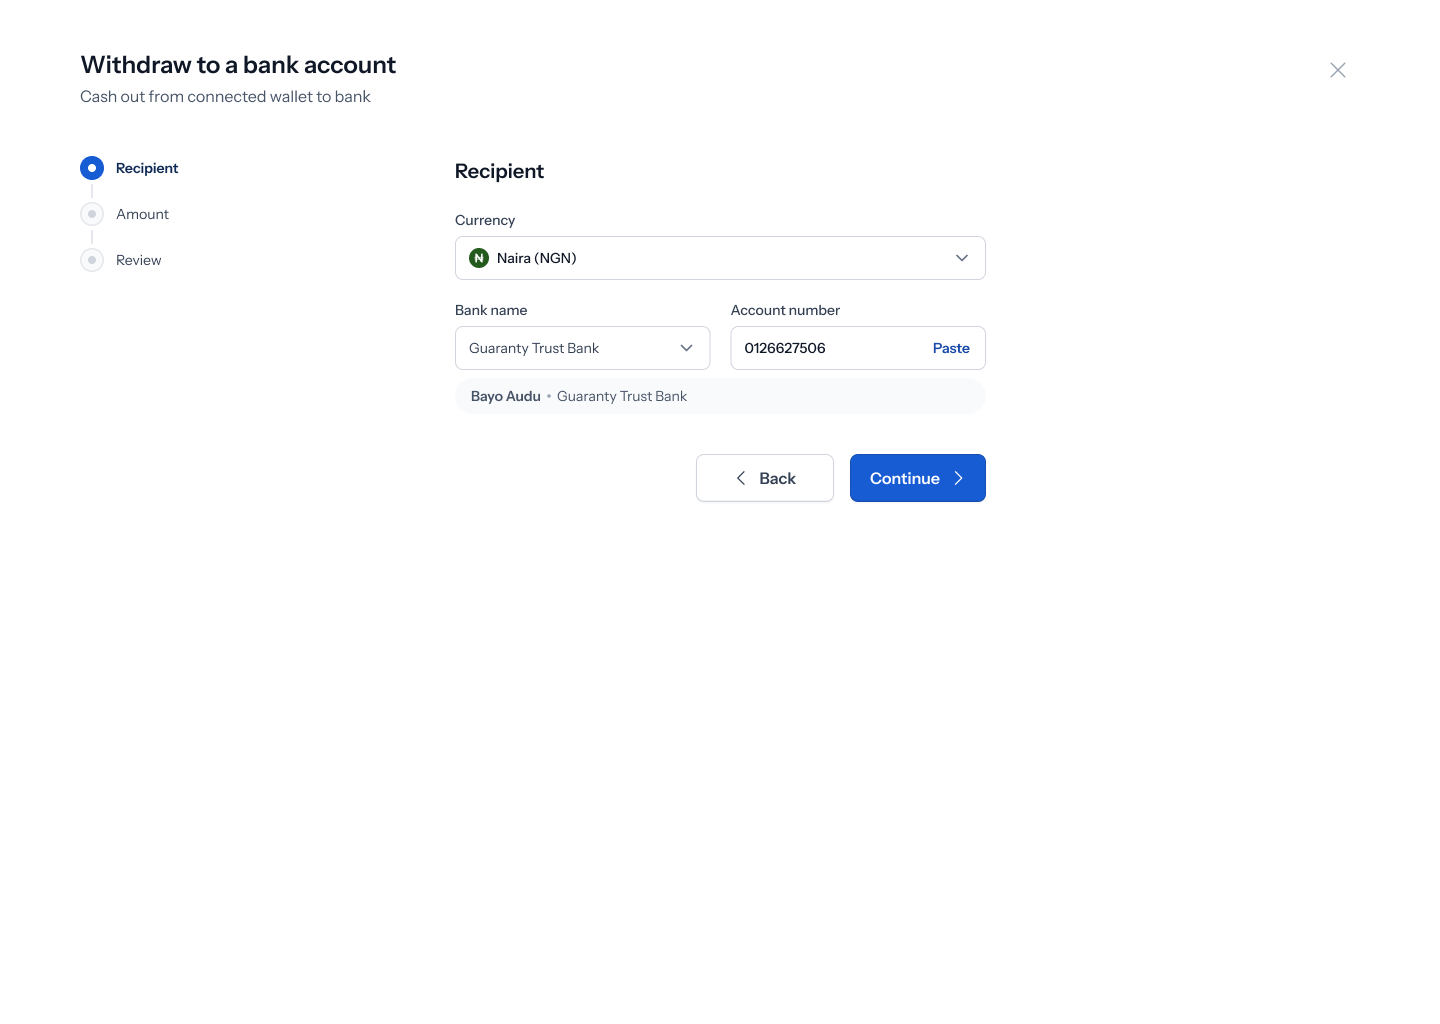
Tapping Get started opens a Withdraw to a bank account screen — “Cash out from connected wallet to bank” — with a three-step tracker down the left: Recipient, Amount, Review. Tap the Currency dropdown to choose Naira, Euro, or Pound. Below that, an or divider offers Recent or Beneficiary tabs to pick a saved destination instead — if you’ve never cashed out before, this shows “No transactions yet” (“Complete a transaction and we’ll show your most recent ones here”).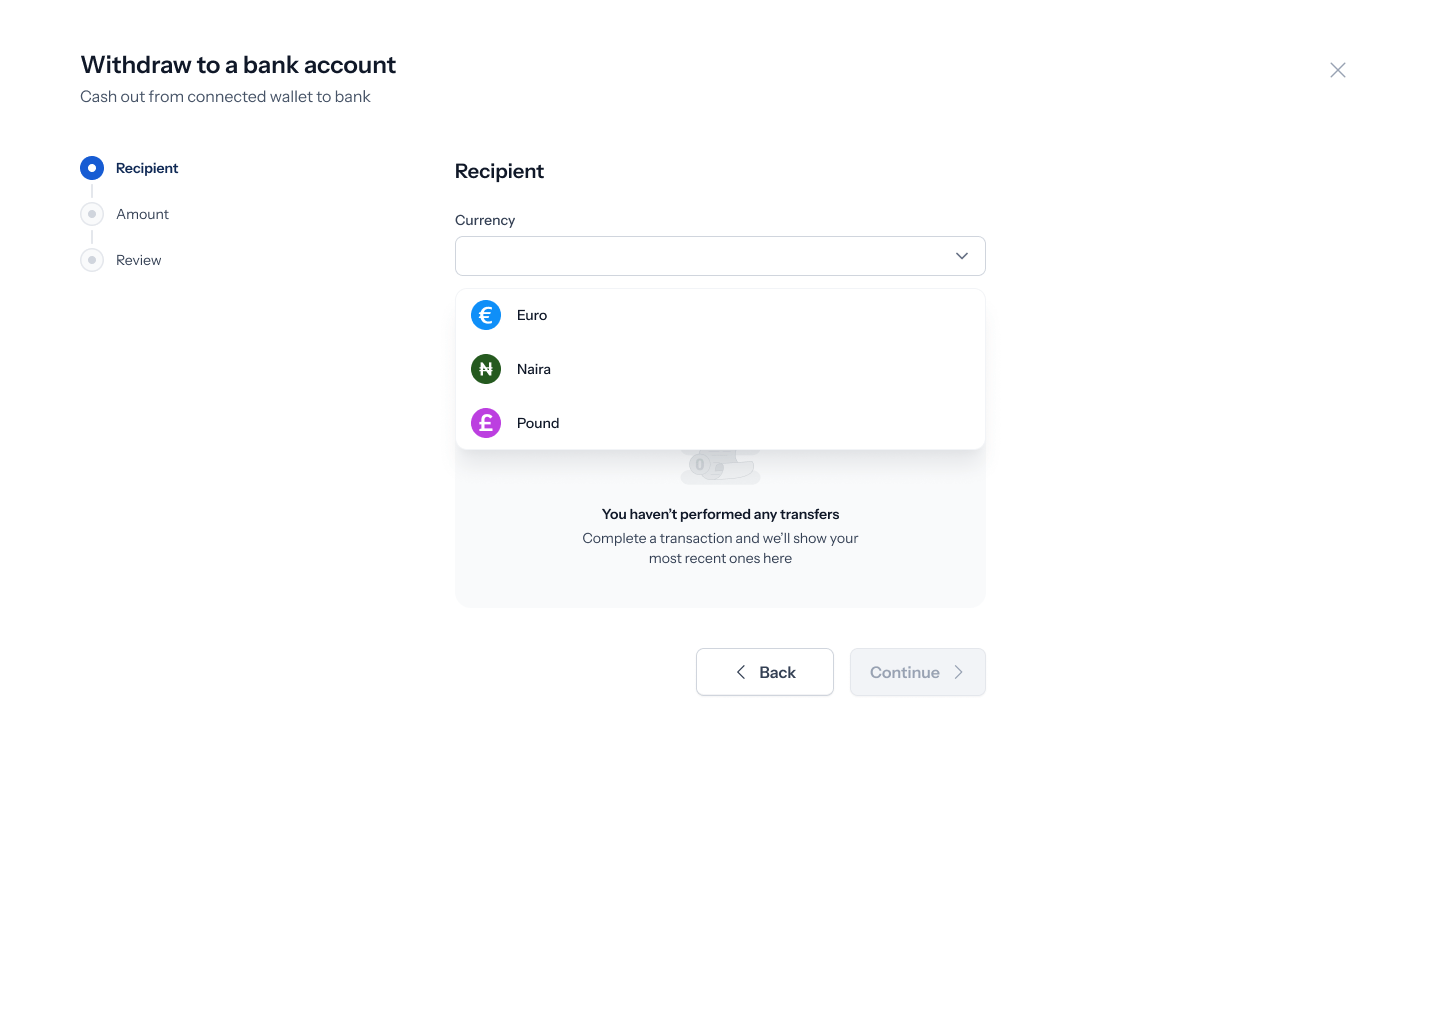
5. Connect your external wallet
Continuing lands you on the Amount step, shown as a swap-style screen with a Send card and a Receive card. The Receive side already shows your chosen currency and confirmed bank details (e.g. “Naira, NGN” and “Bayo Audu, Guaranty Trust Bank”), but the Send side needs a wallet connected — it shows a Connect External Wallet button instead of an asset picker. A Narration (optional) field sits below for adding a description to the transfer.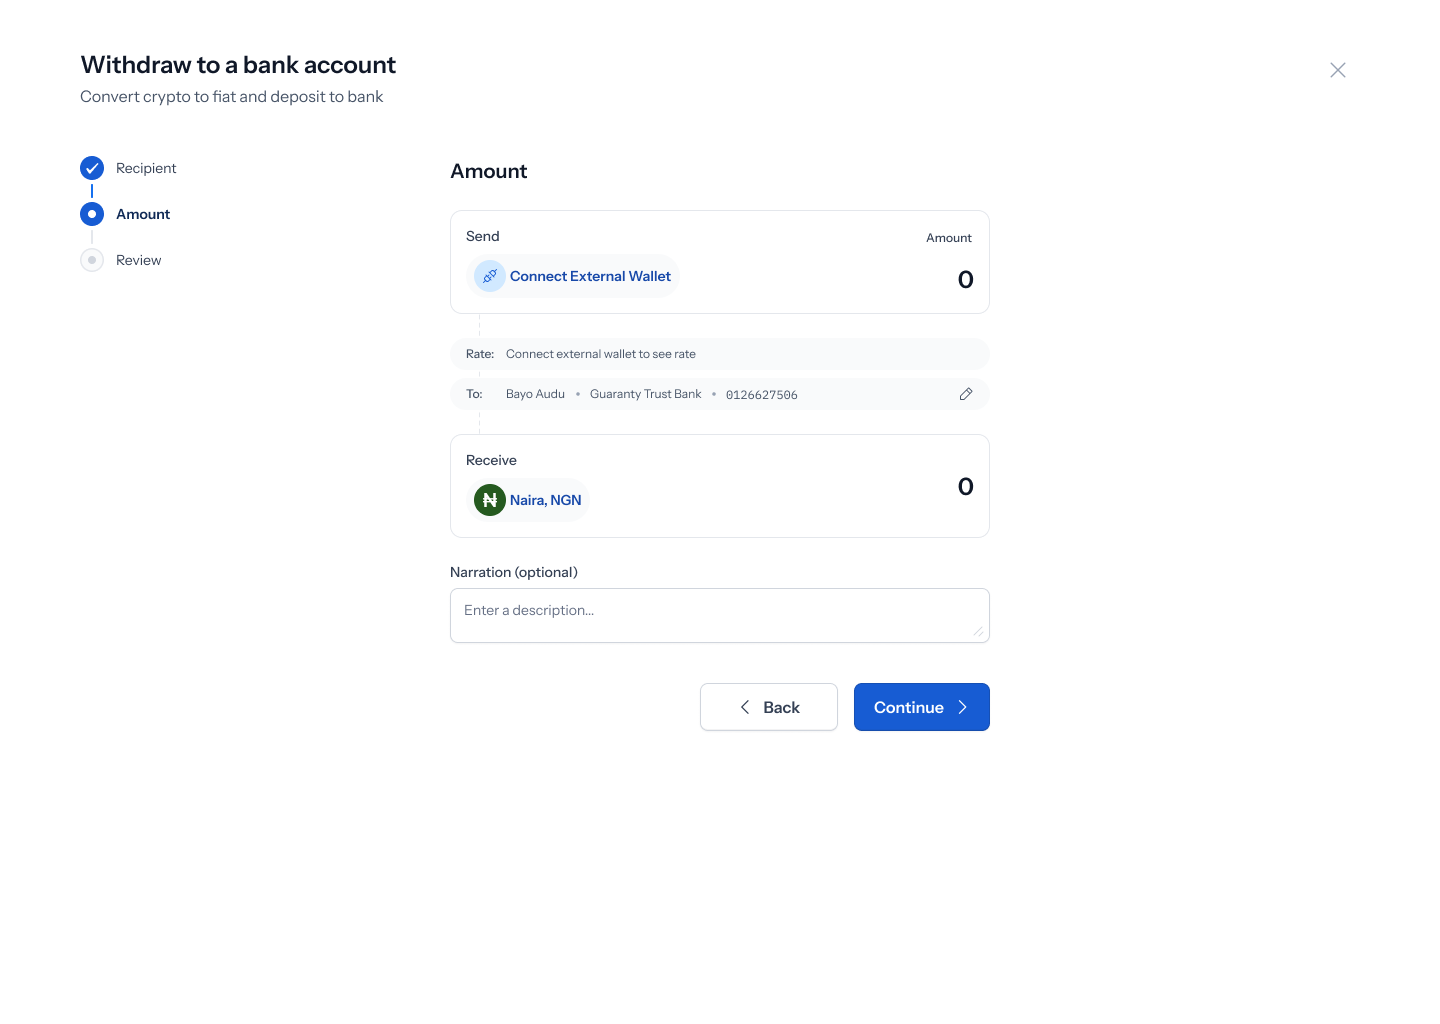
6. Pick the asset to send and enter an amount
Once connected, the Send card shows the wallet’s asset (e.g. USDT on Arbitrum) with a live rate against the destination currency (e.g. “1 USDT ≈ 1454 NGN”), plus a From: row naming the connected wallet (e.g. Metamask) and its truncated address. Type an Amount in the Send card — the Receive card calculates automatically (e.g. sending $10 computes to roughly ₦14,539.2). Tap Continue.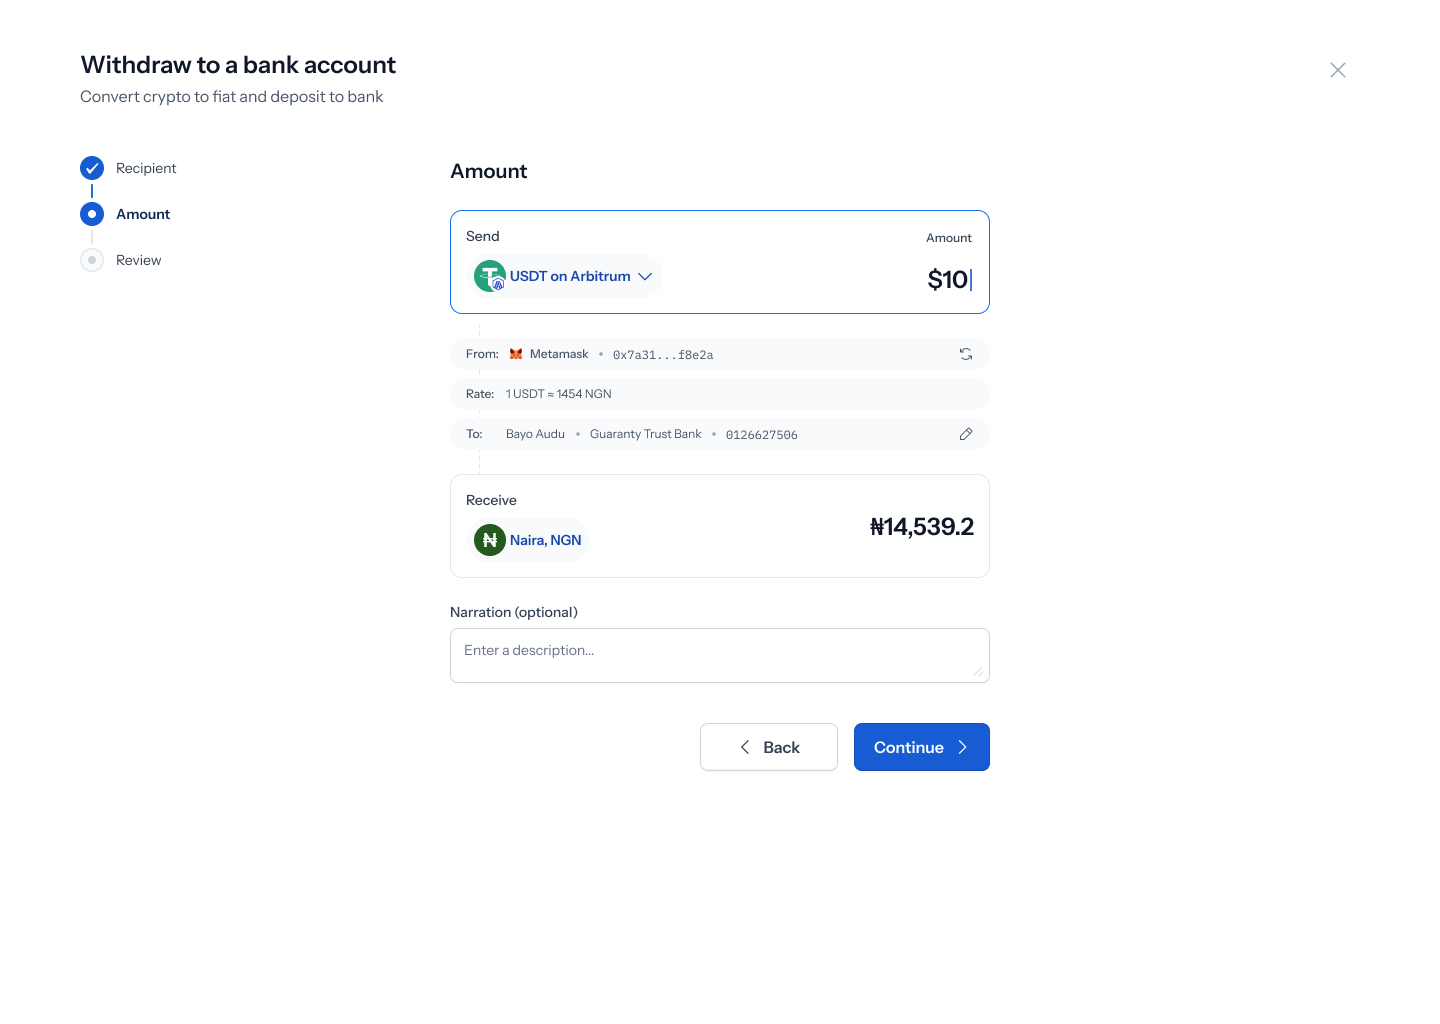
7. Review before you authorize
The Review screen shows your withdrawal as a single summary — for example, $10 USDT (Arbitrum) → ₦14,539.2 Naira — along with Type: Withdrawal, Estimated time: ~30s, From (your connected wallet, address truncated), and To (the recipient name and bank, tagged Bank Account). Tap Back to change anything, or Authorize Transaction to continue.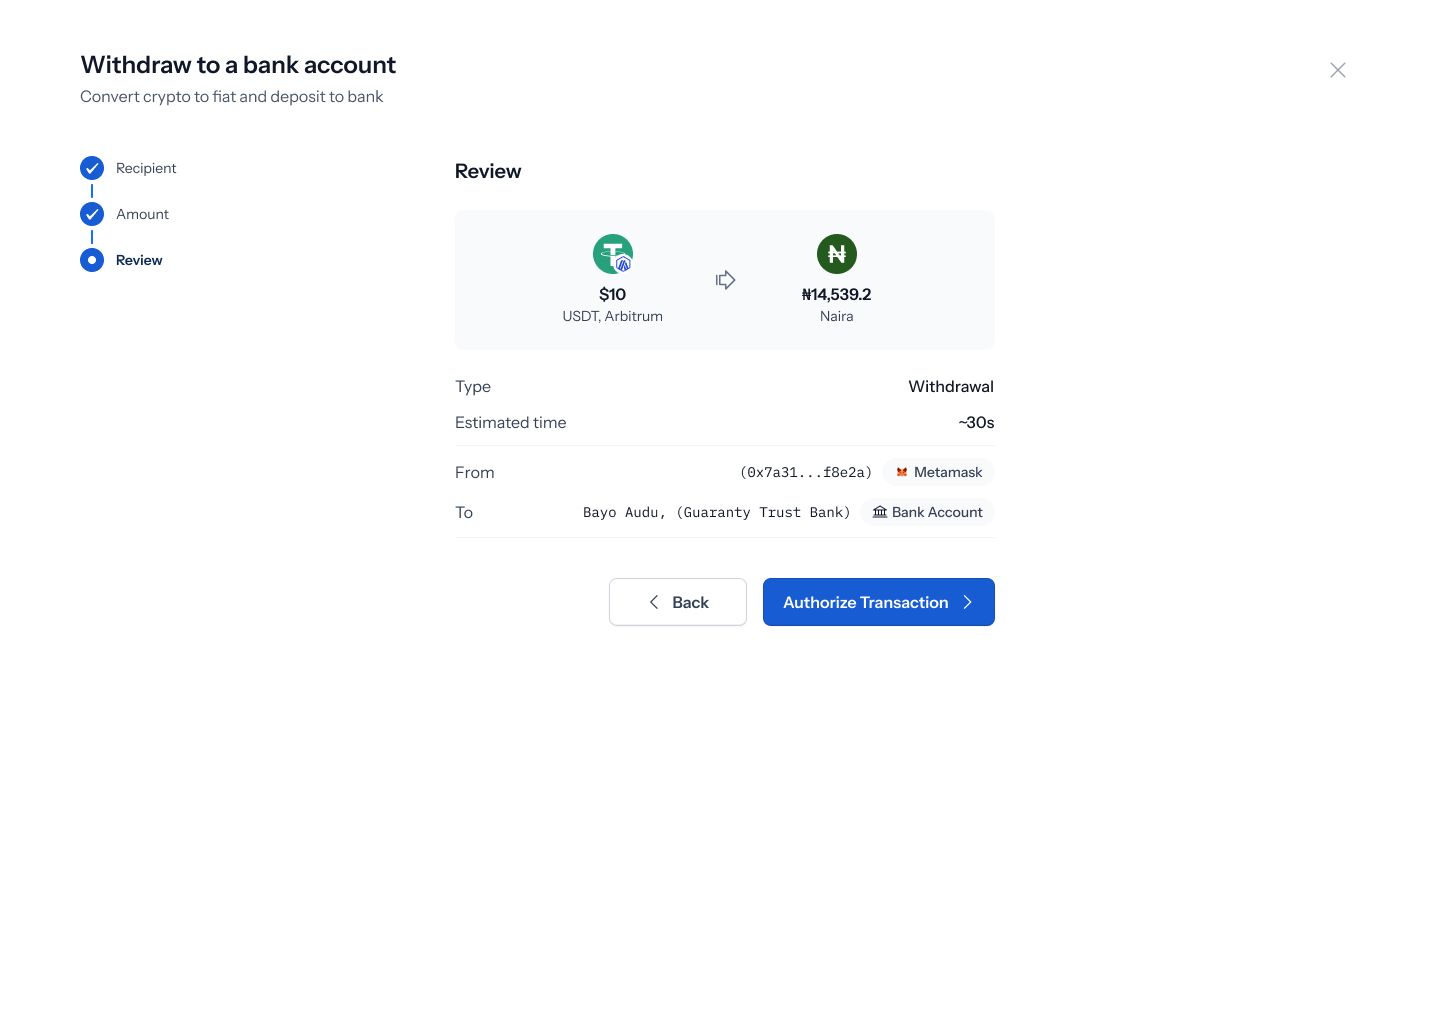
8. Authorize the transaction
As with the rest of Move Money, authorization is done with your device’s passkey — Face ID, Touch ID, or your device’s biometric/PIN unlock. There’s no code to type in; the native prompt appears on top of the review screen, and confirming it submits the withdrawal.9. Confirmation
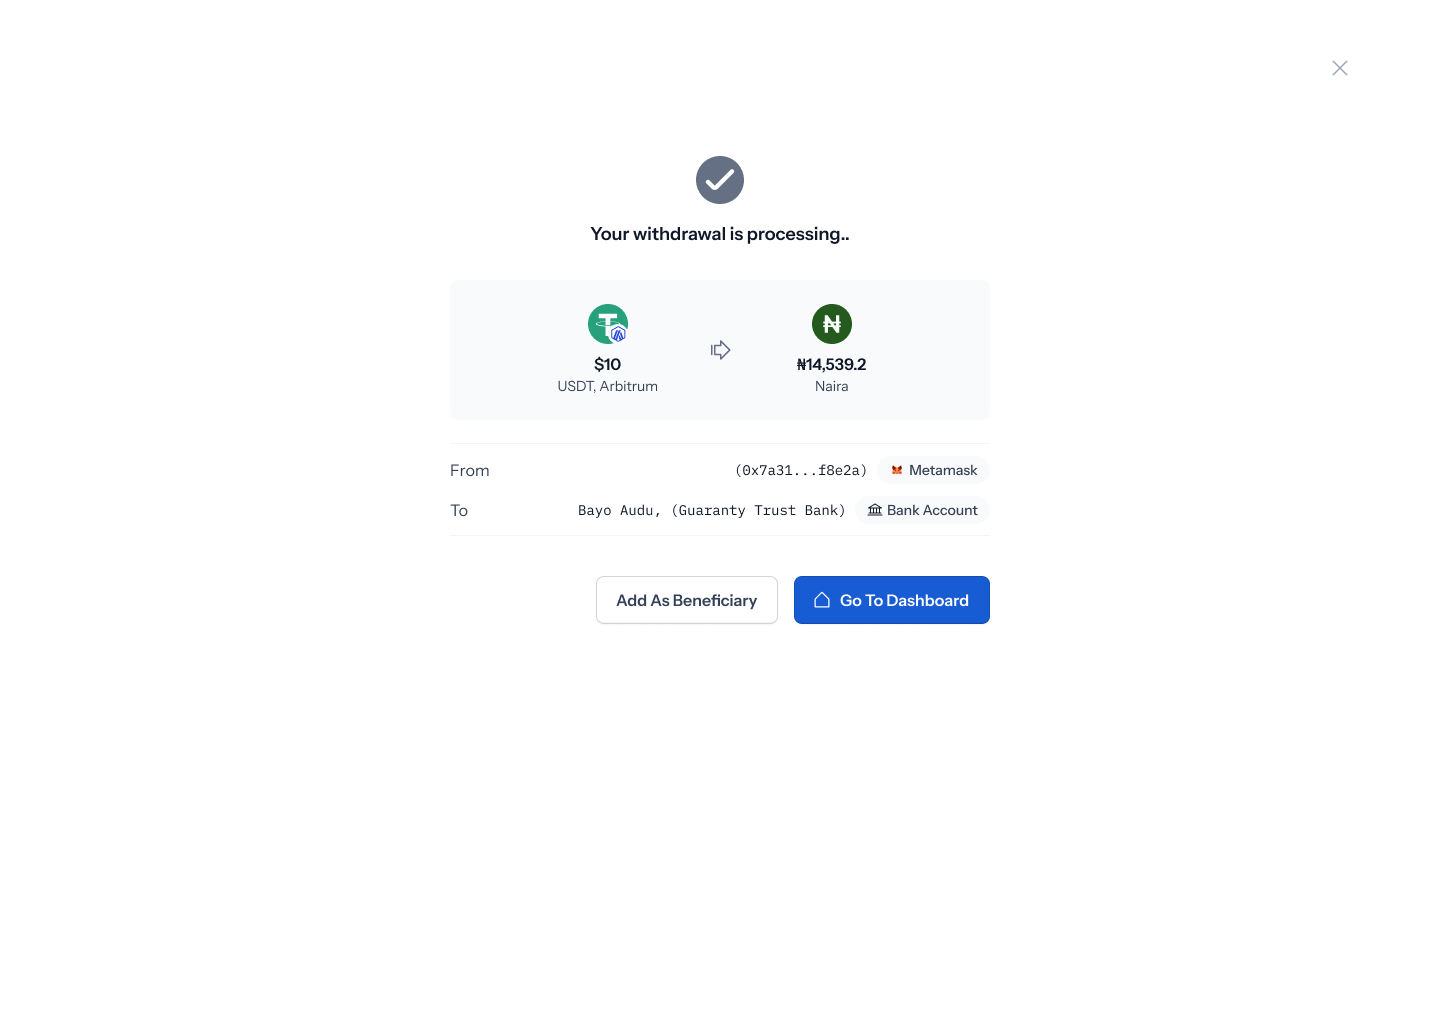
Once you authorize, you’ll land on a confirmation screen reading “Your withdrawal is processing..”, showing the same summary (amount, From, To), with Add as Beneficiary or Go to Dashboard to finish up.